SP Tuning SRT-4 Battery Relocation Kit Installation Instructions
Published by Stephen Petrie on Jun 23rd 2021
SP Tuning SRT-4 Battery Relocation Kit Installation Instructions
Installation time: 1-2 hours.
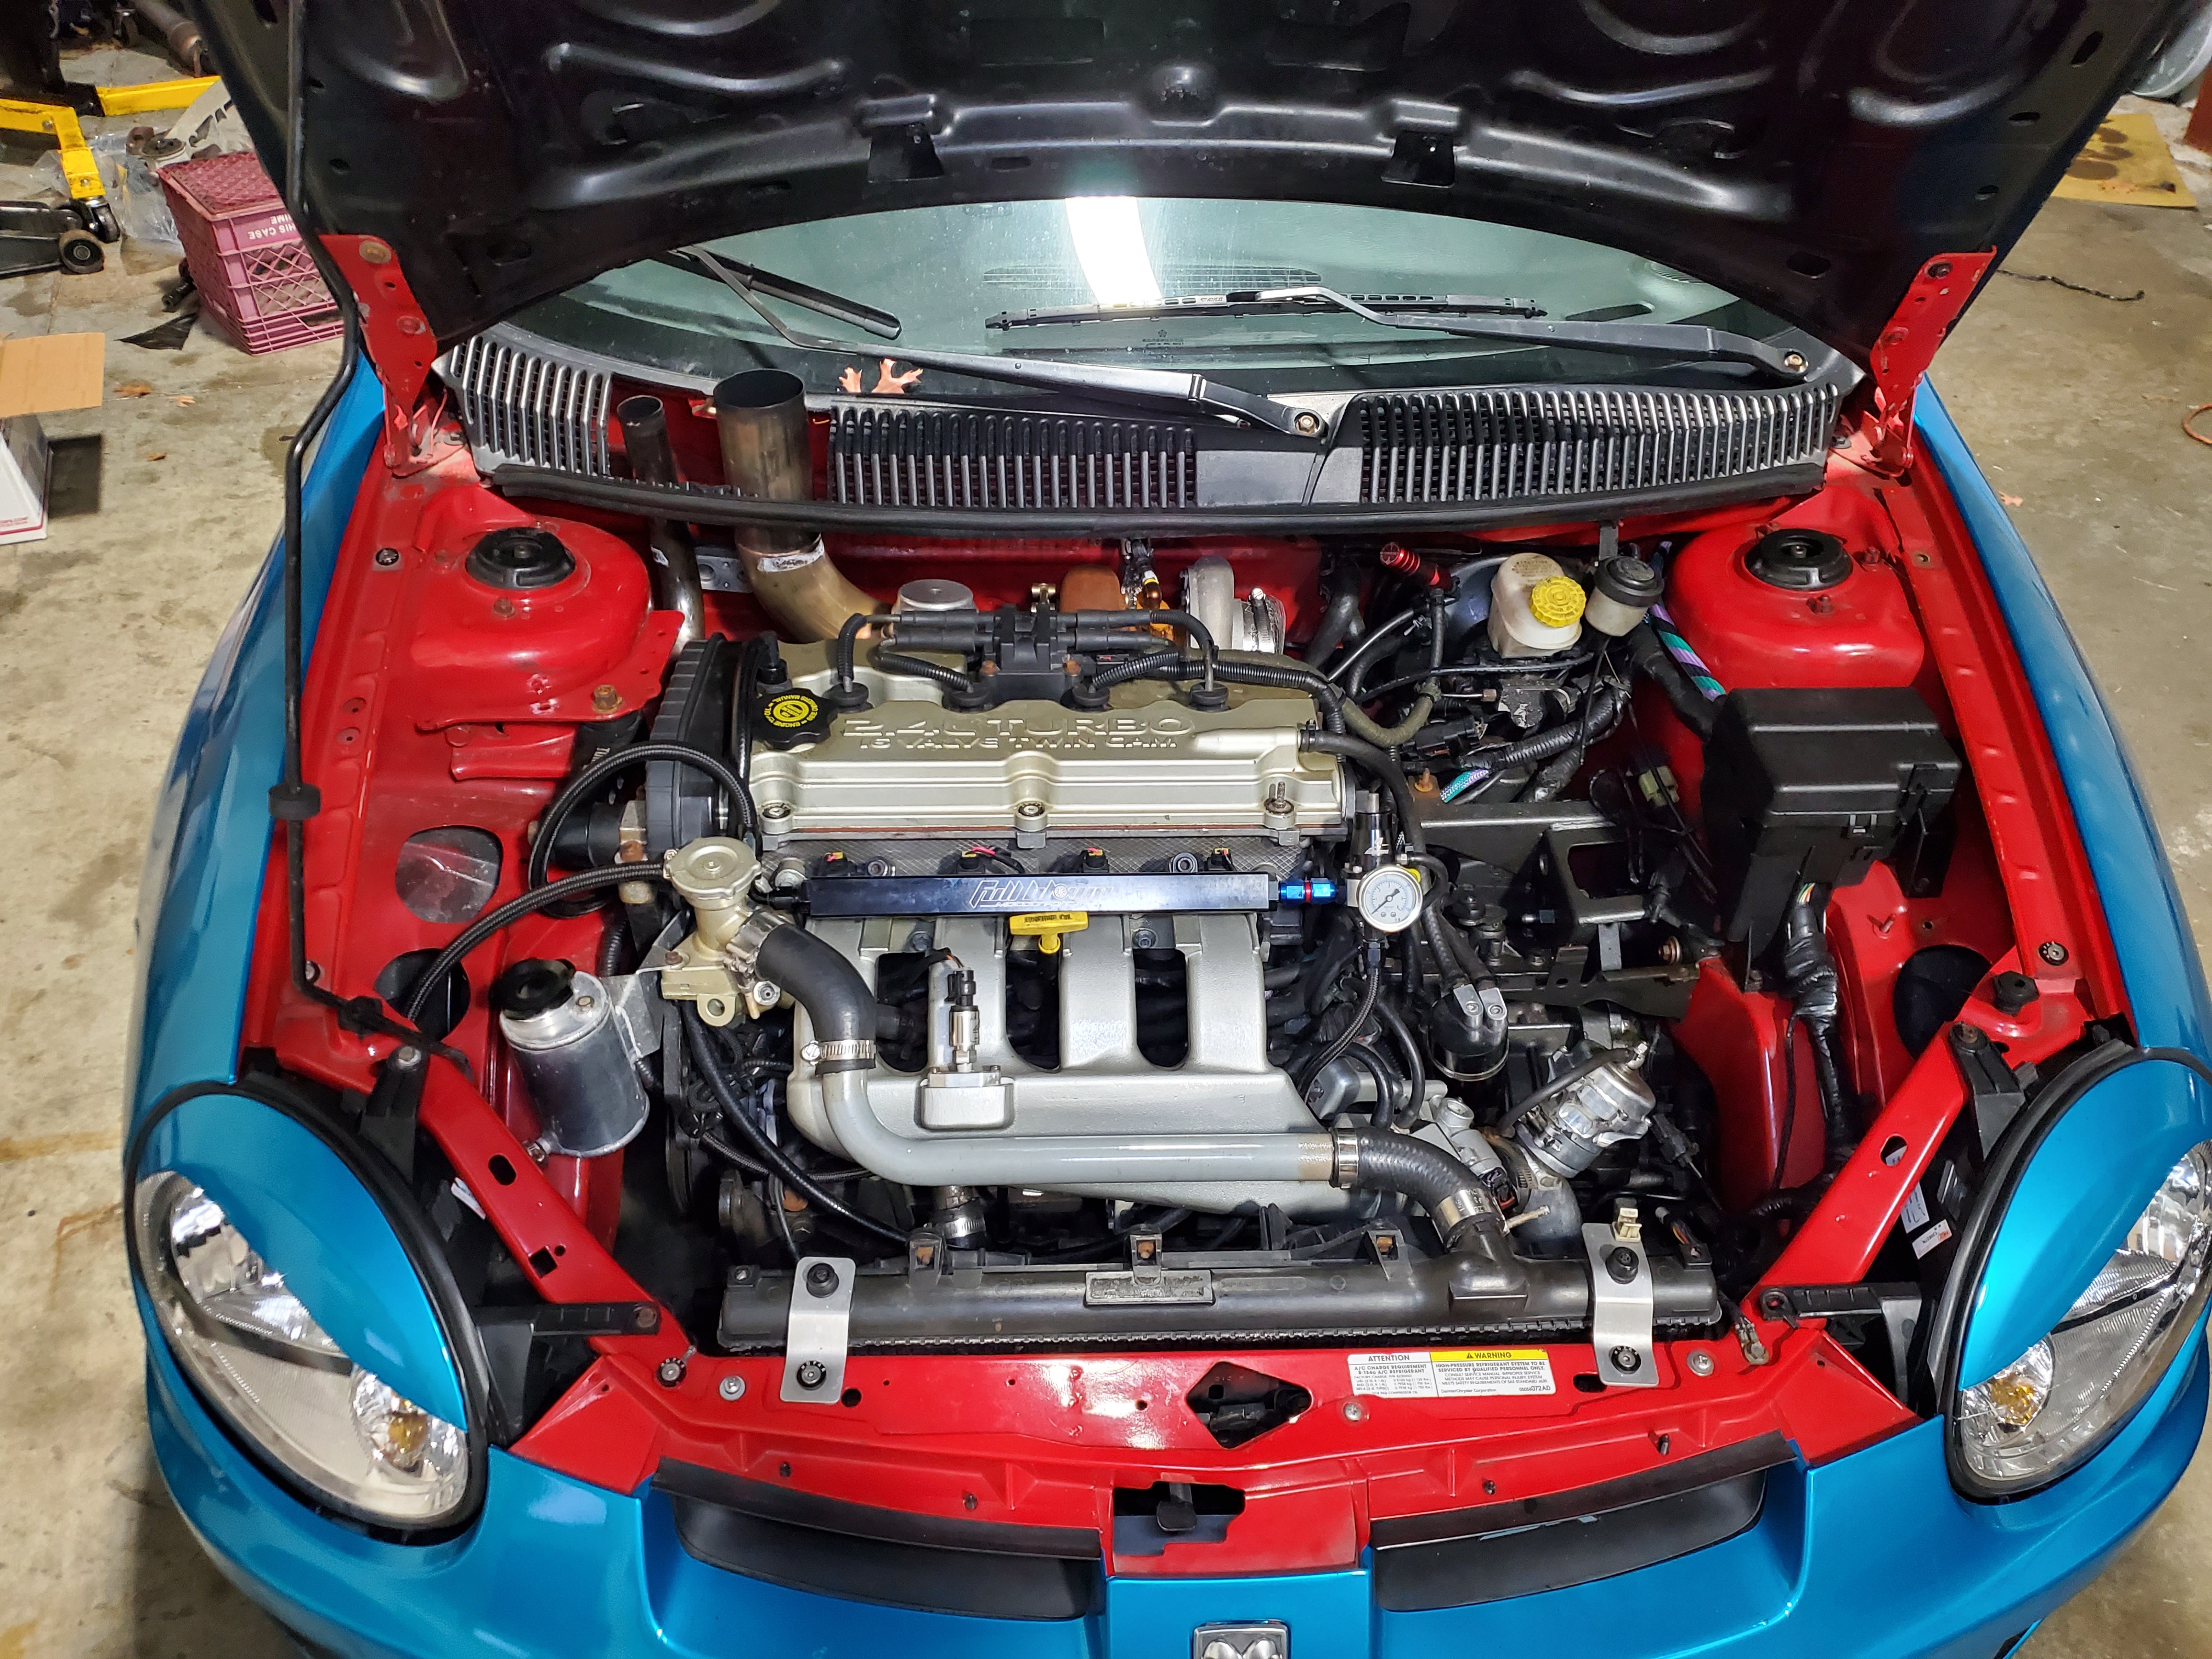
When installing your SP Tuning SRT-4 Pre-Made Battery Relocation Kit it is assumed that your battery is still located in its factory position on the drivers side next to the strut tower like pictured below:
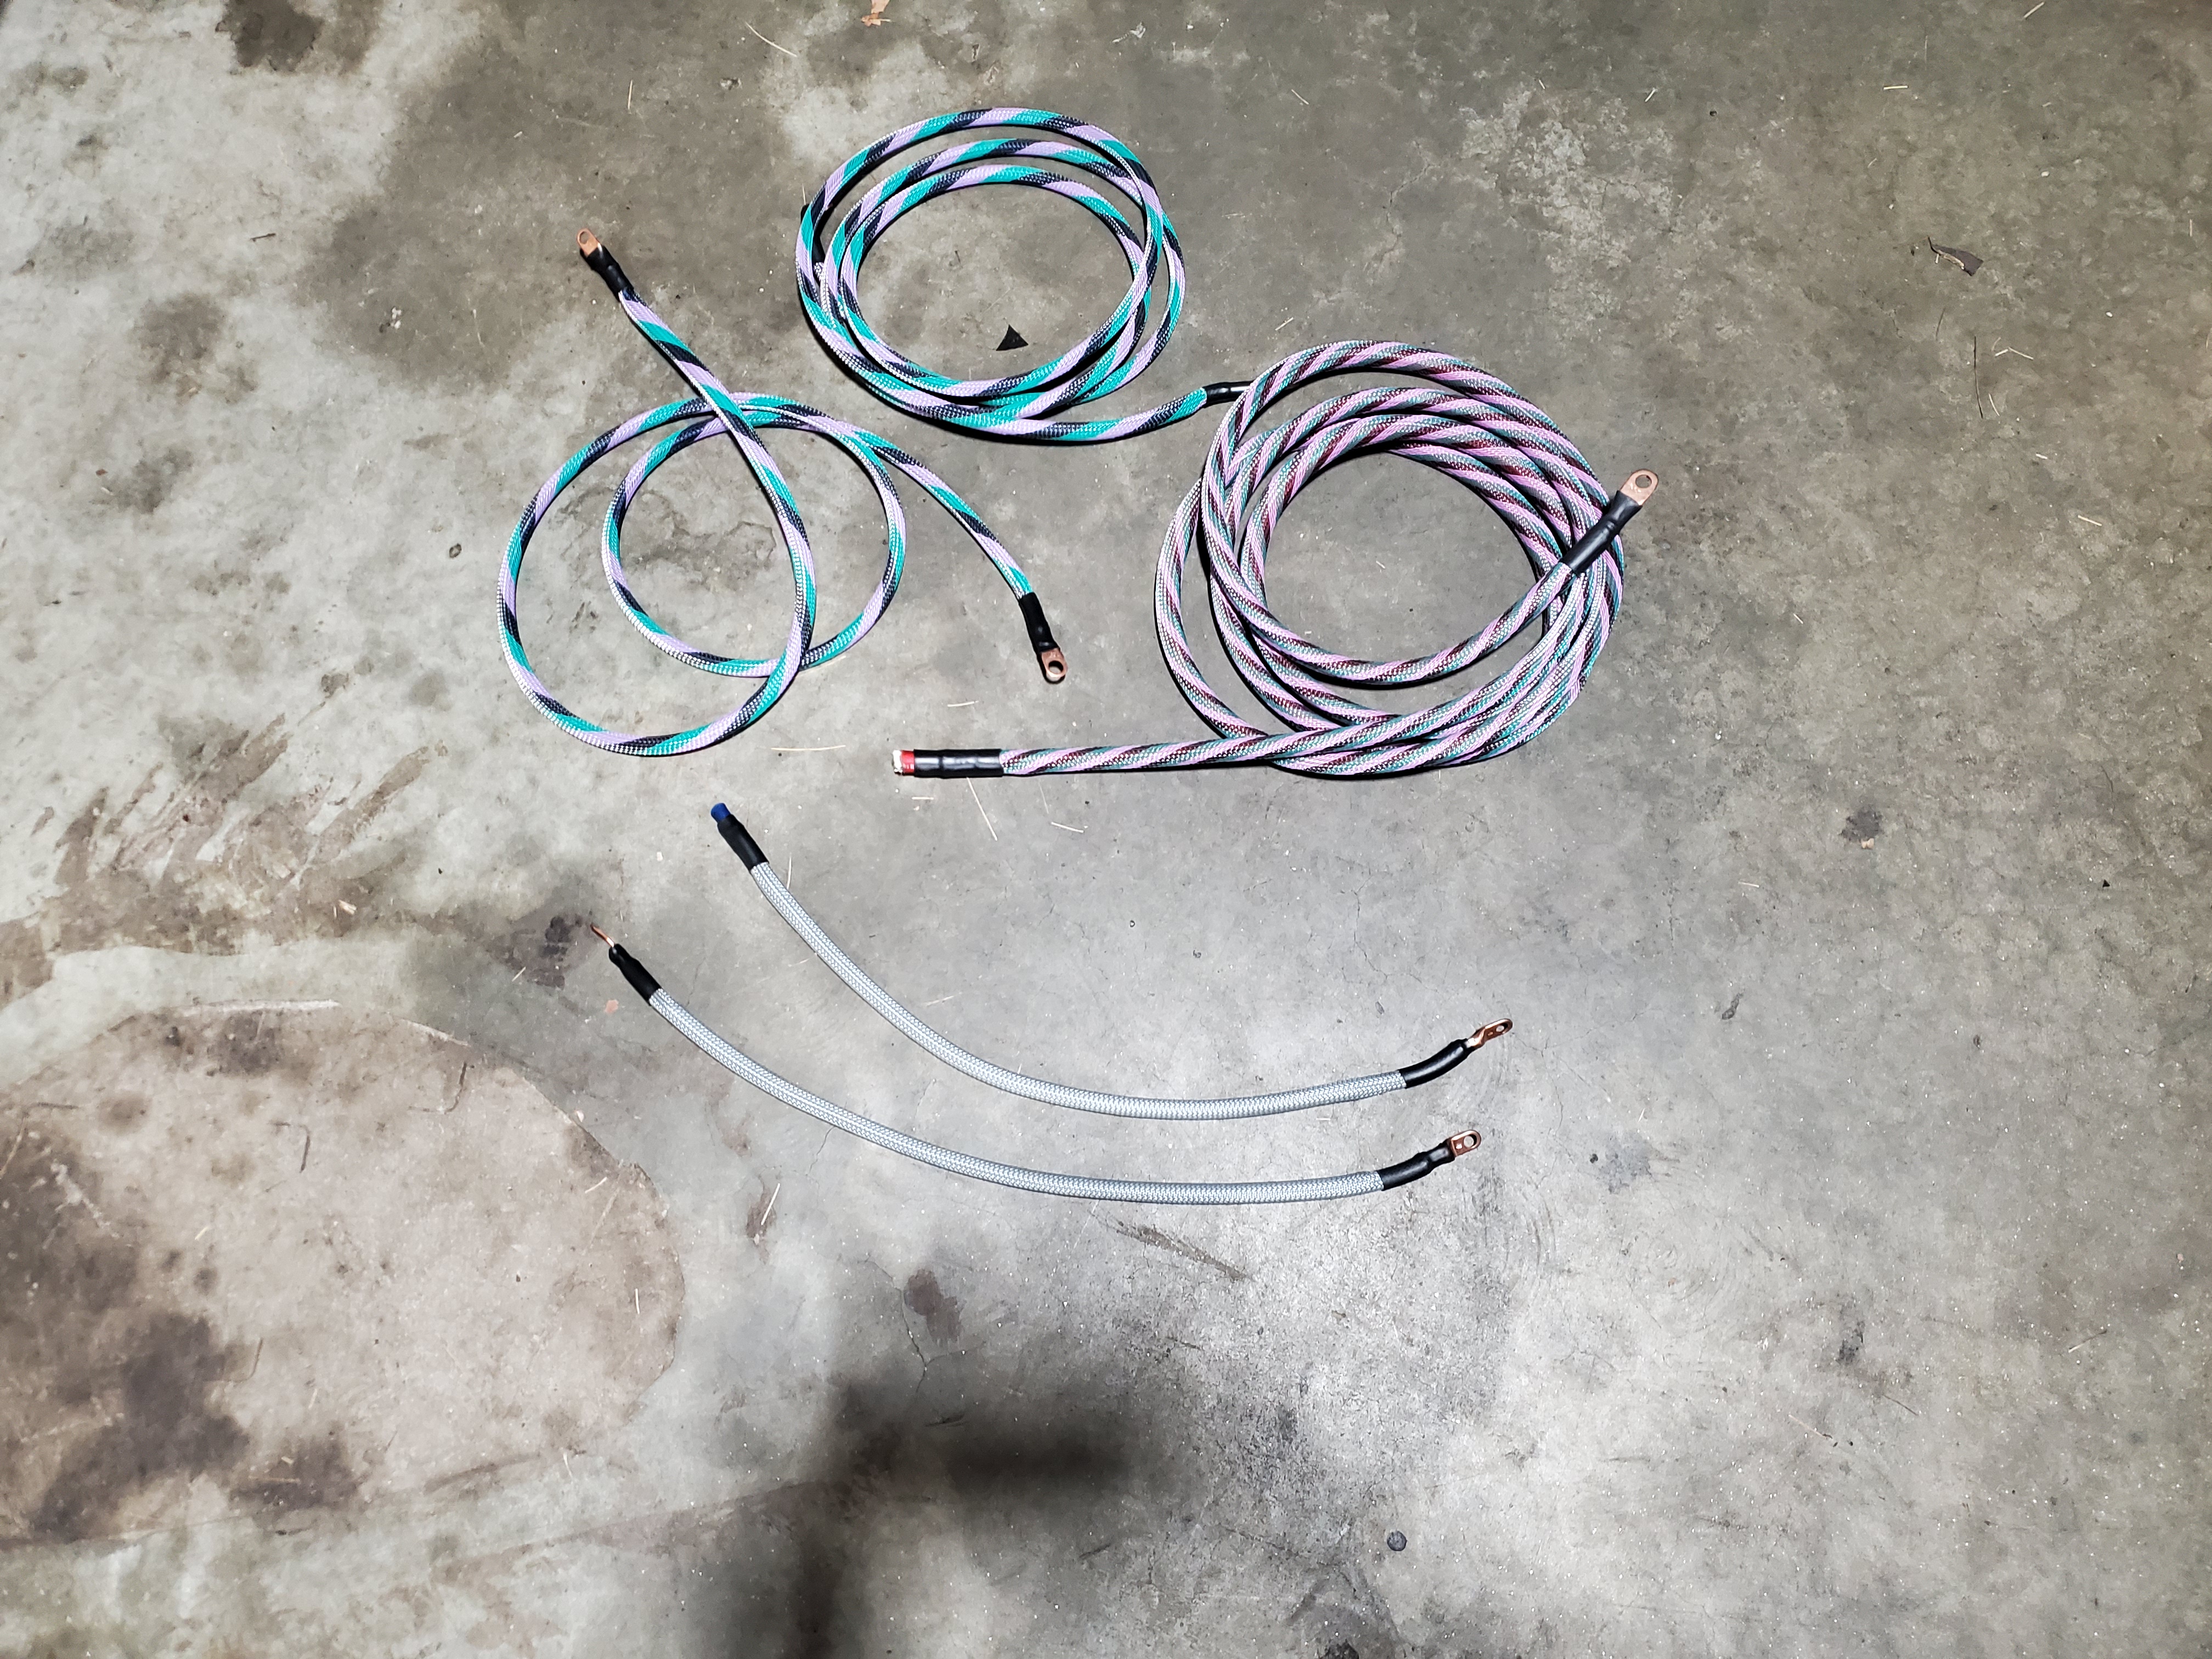
Before we begin installation, you will want to lay out your complete kit which should consist of the following:
- (1) 0Gauge main power wire with battery terminal
- (2) 4gauge power wires (the wire with the 45/90 degree terminal end is for the starter power)
- (2) Ground wires (one has a battery terminal and the other is your new starter ground)
- (1) Power stud
- (2) M6 washers
- (1) M6x1.0 flat nut
The kit together should look like this:
First things first, begin by disconnecting and removing your battery. The factory terminals both have 10mm nuts on the terminals.
Once the terminals have been disconnected, remove the battery tie-down from behind the battery. You will need a 13mm socket along with a small extension and ratchet to reach it.
Now with the battery out of your way you can remove the factory battery tray which is secured by (2) 10mm nuts (2) 10mm bolts and (1) 13mm bolt in the front.
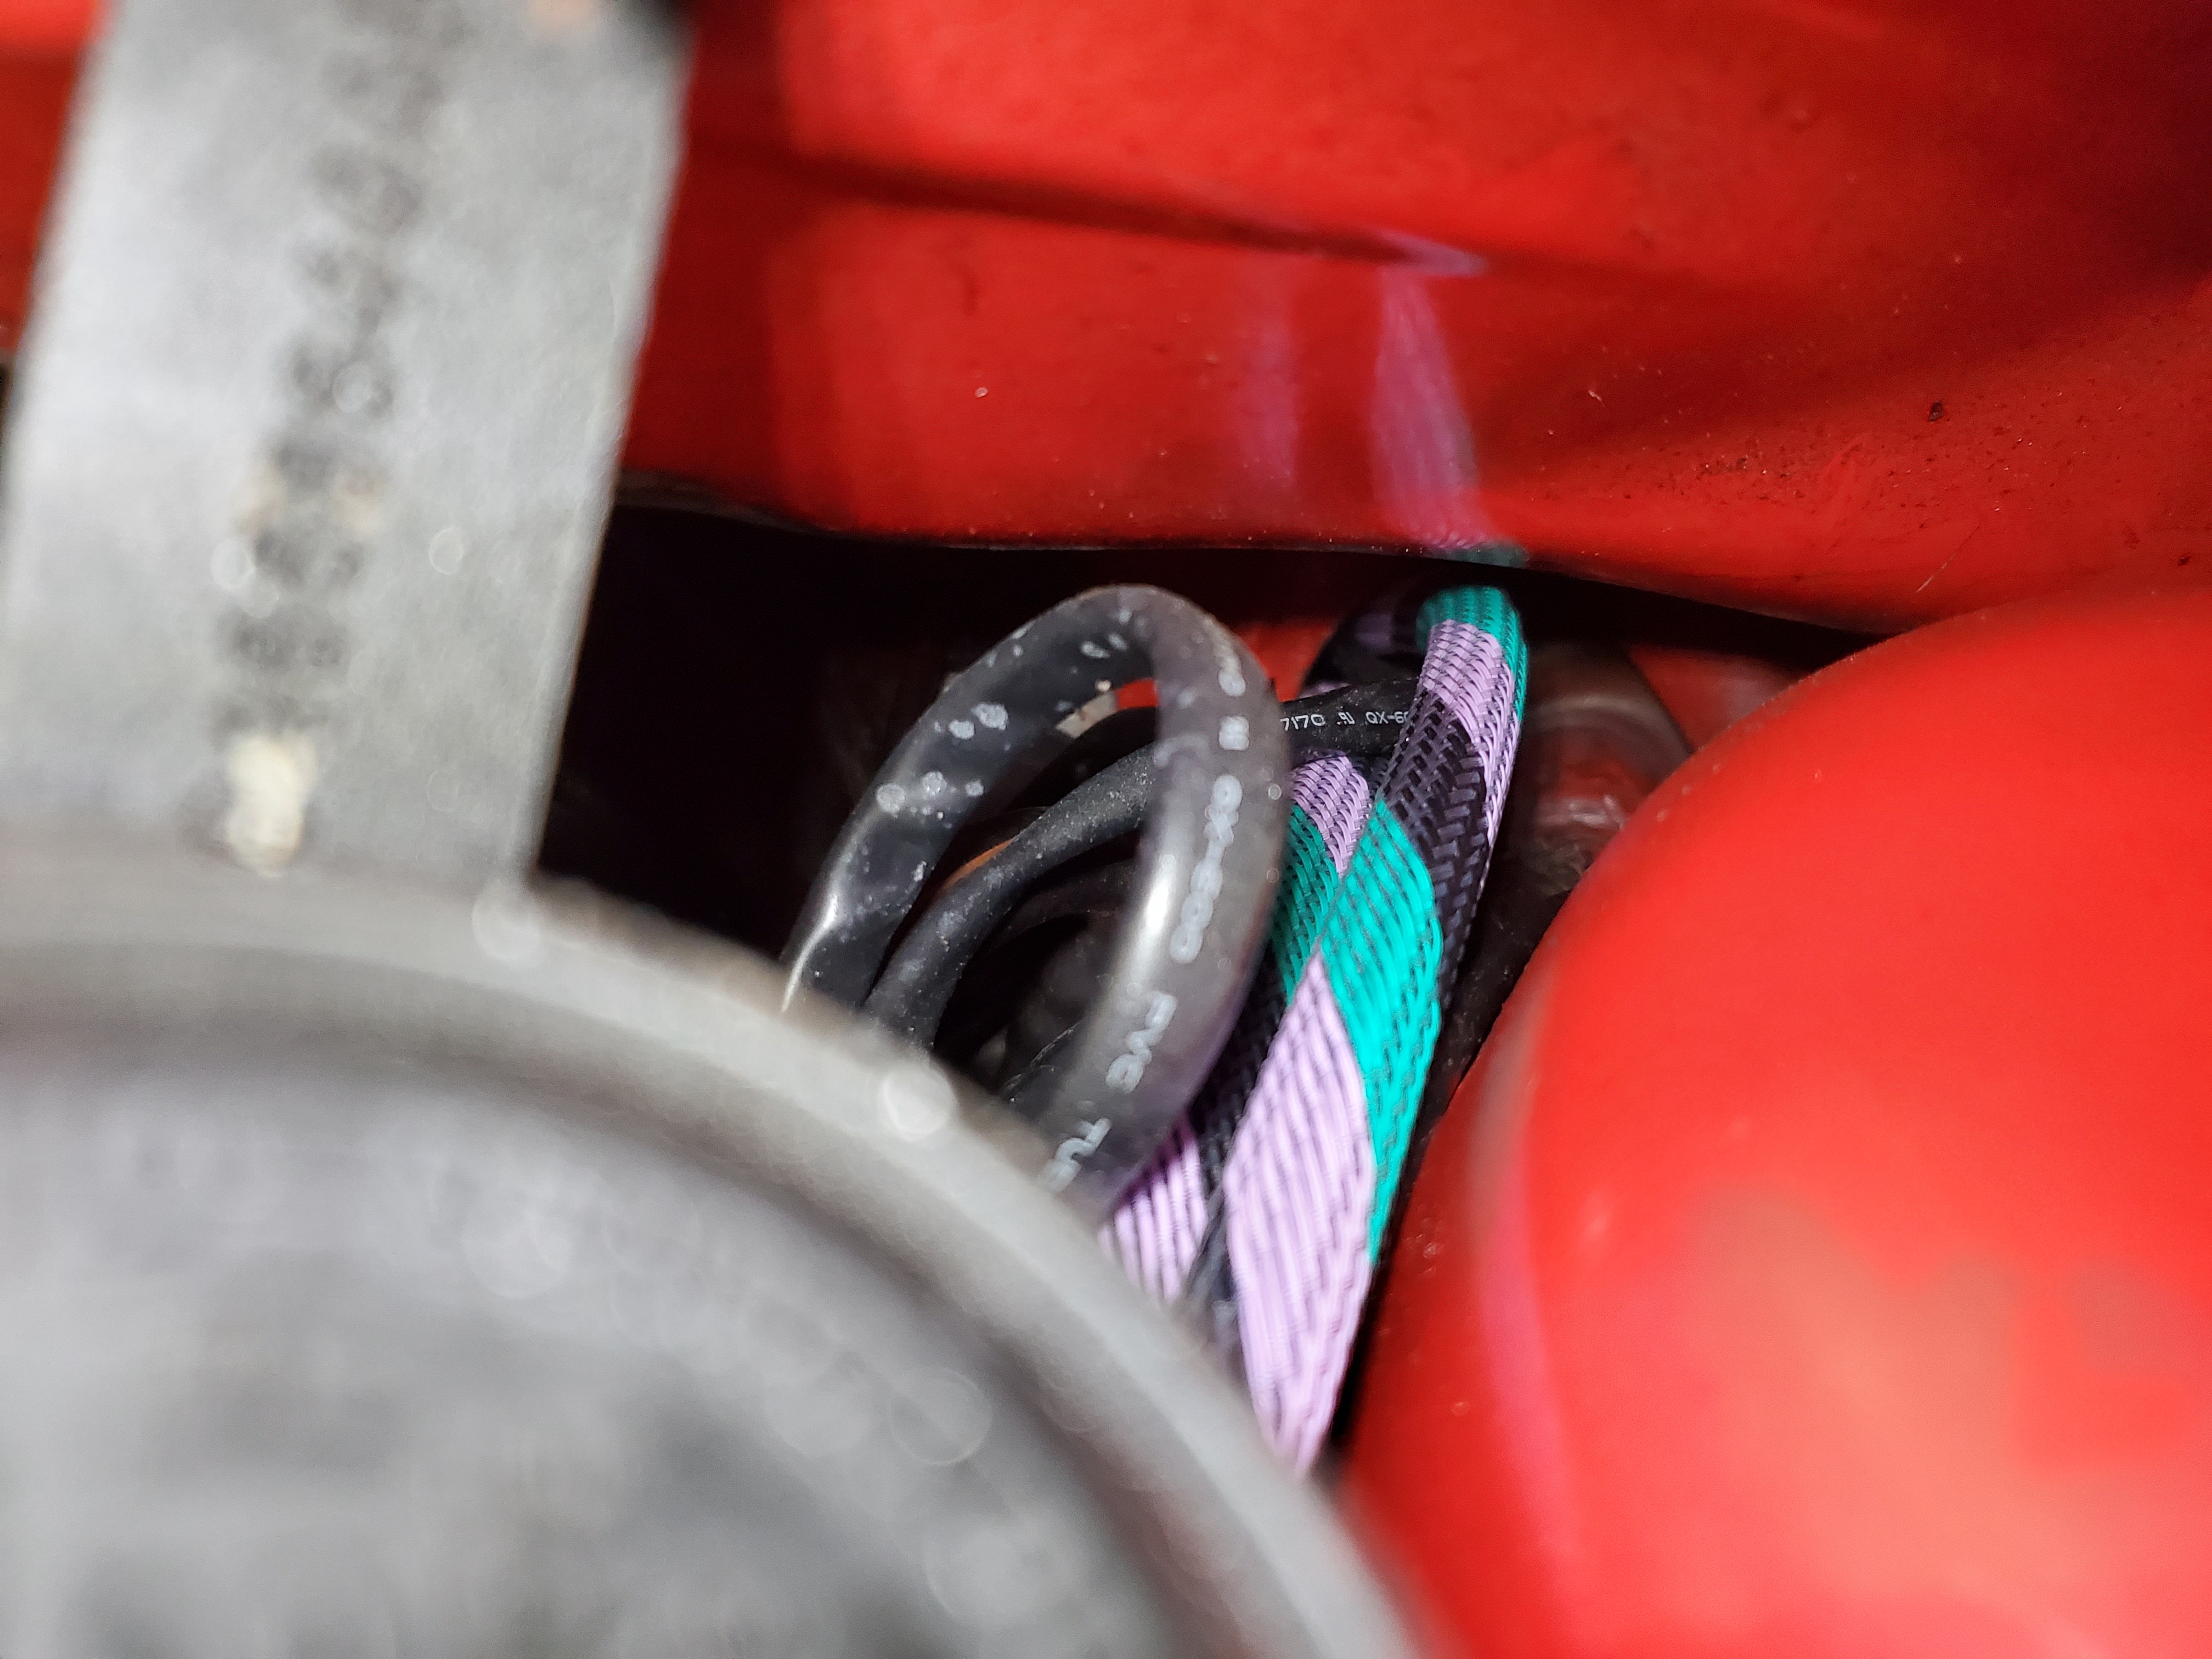
The next step is to take both of the 4Gauge powers and poke a hole into the factory rubber grommet on the drivers side of the firewall just behind the strut tower. The bigger openings on the terminals go into the car, the smaller ones stay in the engine bay. You will need a coat hanger or something similar to be able to pass the wires through from the engine bay into the cabin. We use a factory SRT-4 antenna, what else are those good for anyways?
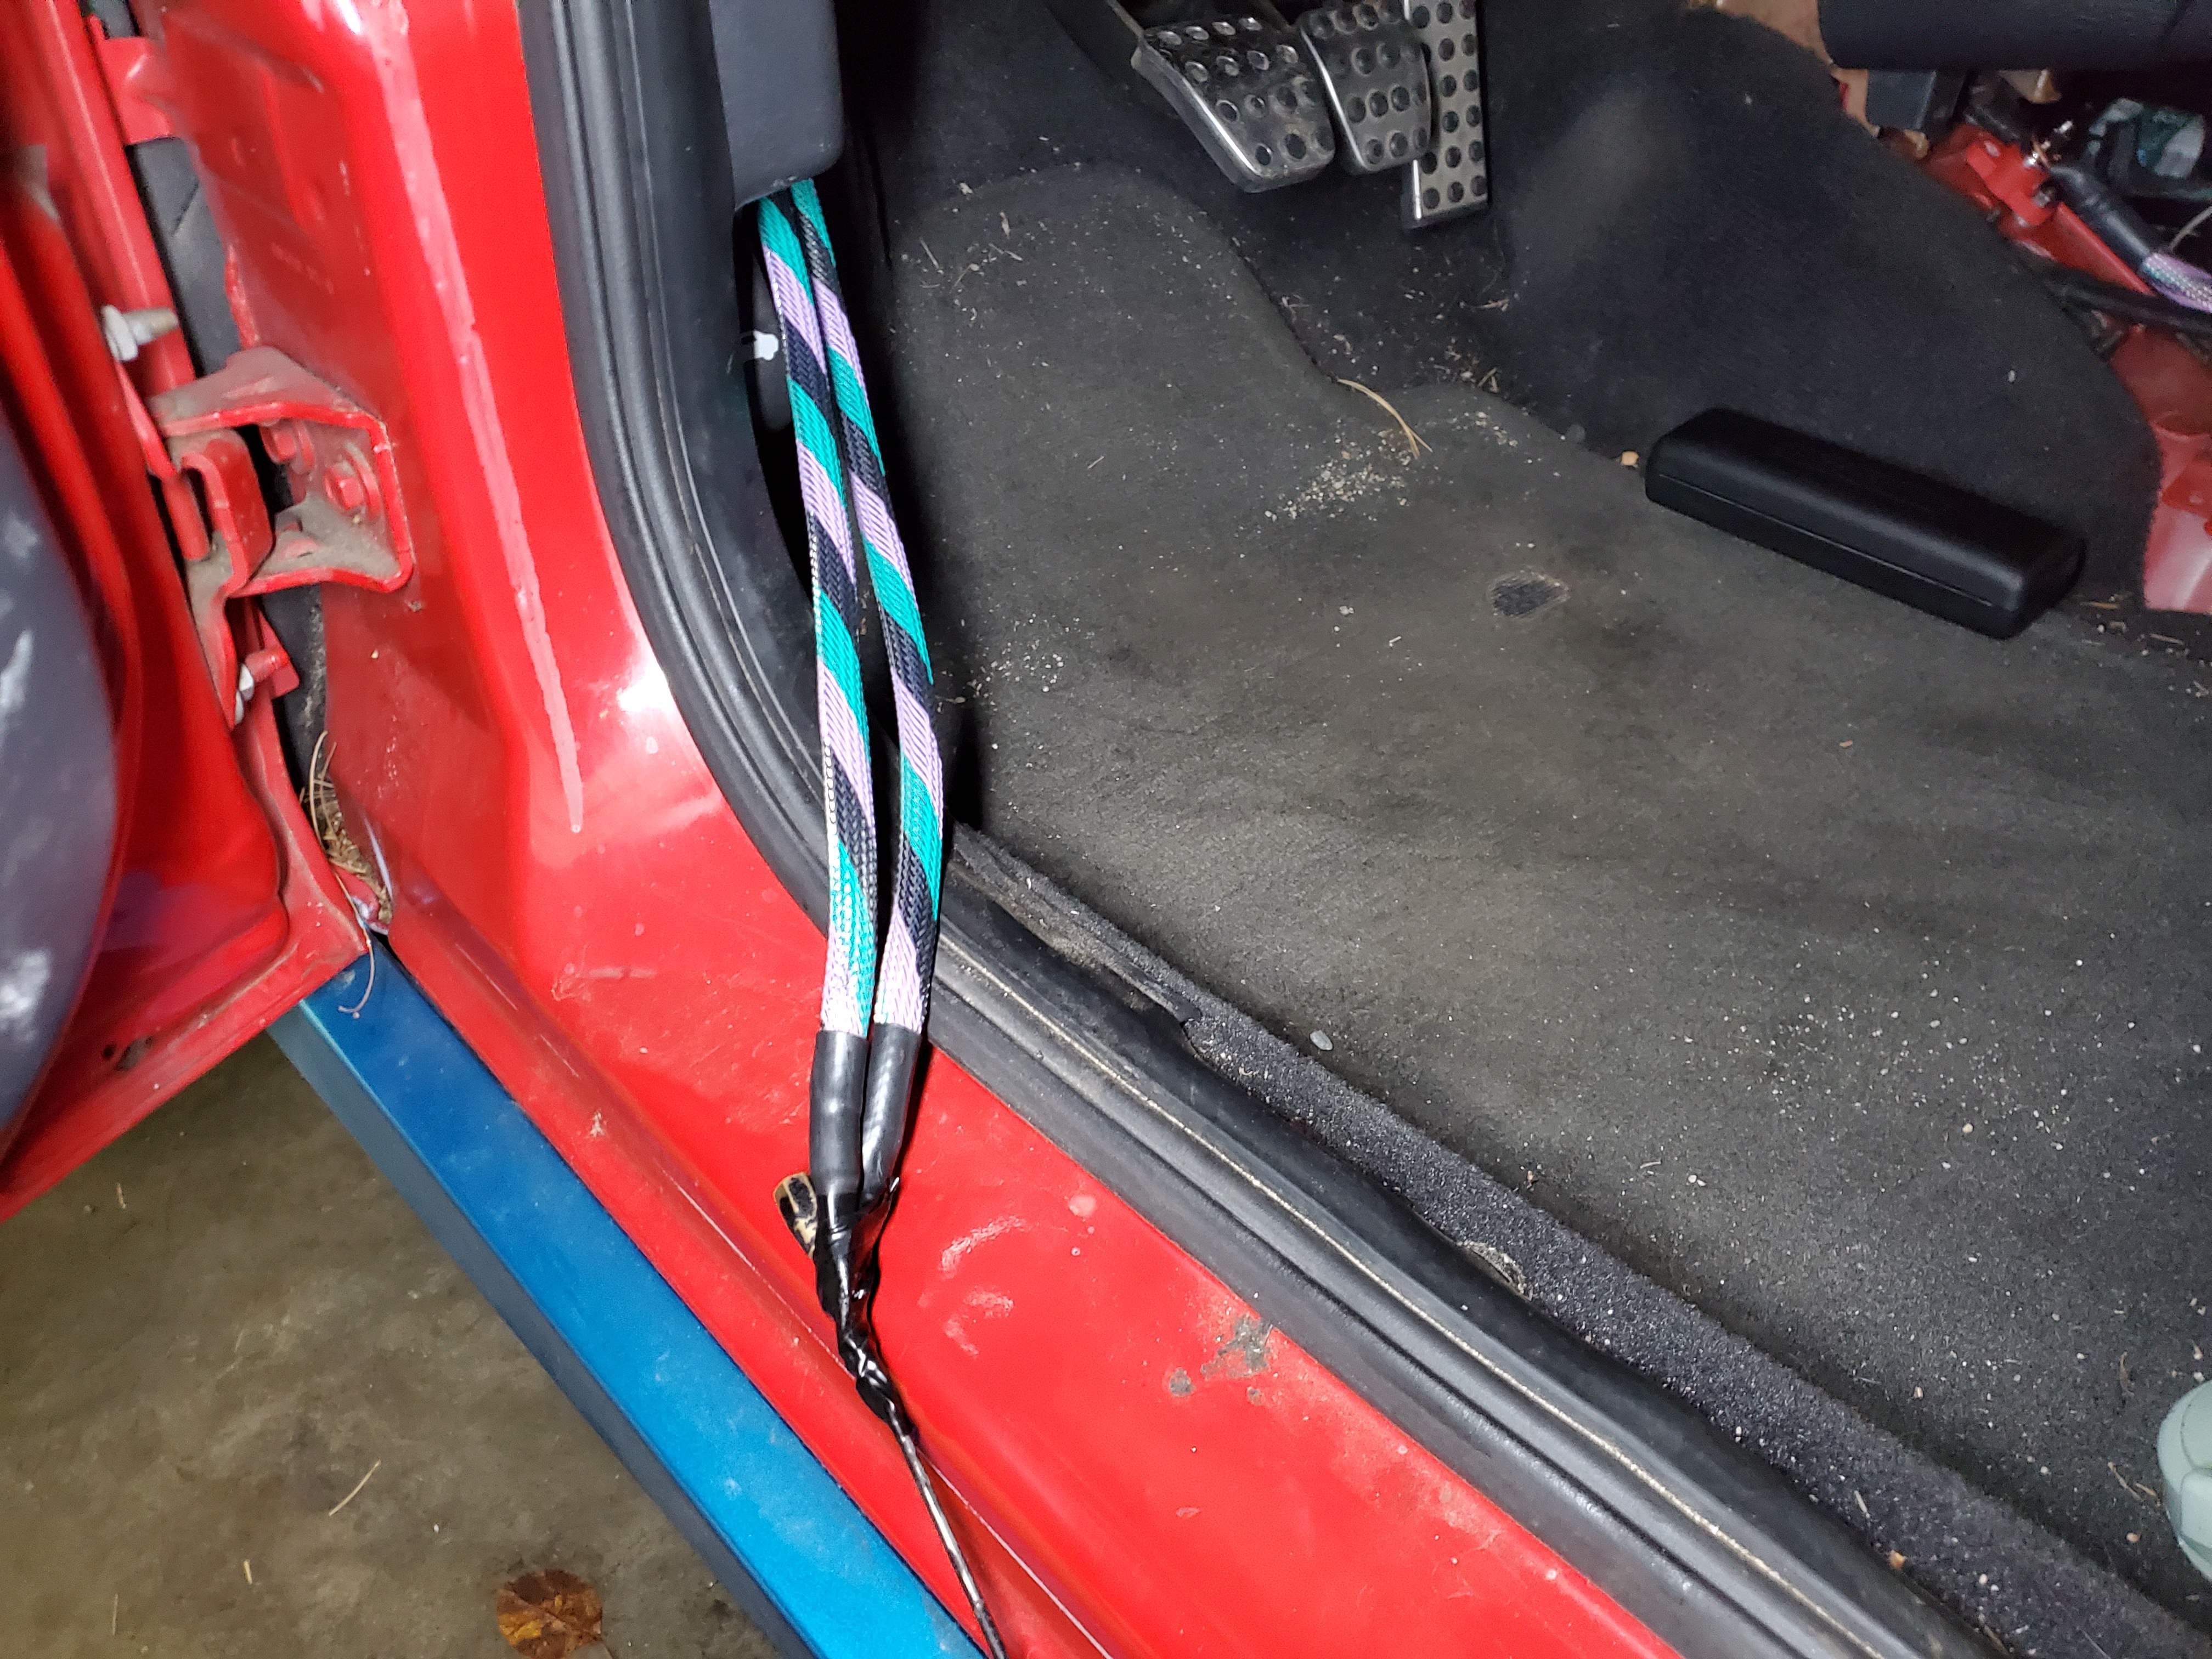
You should now have the wires pulled through the inside of the cabin like below:
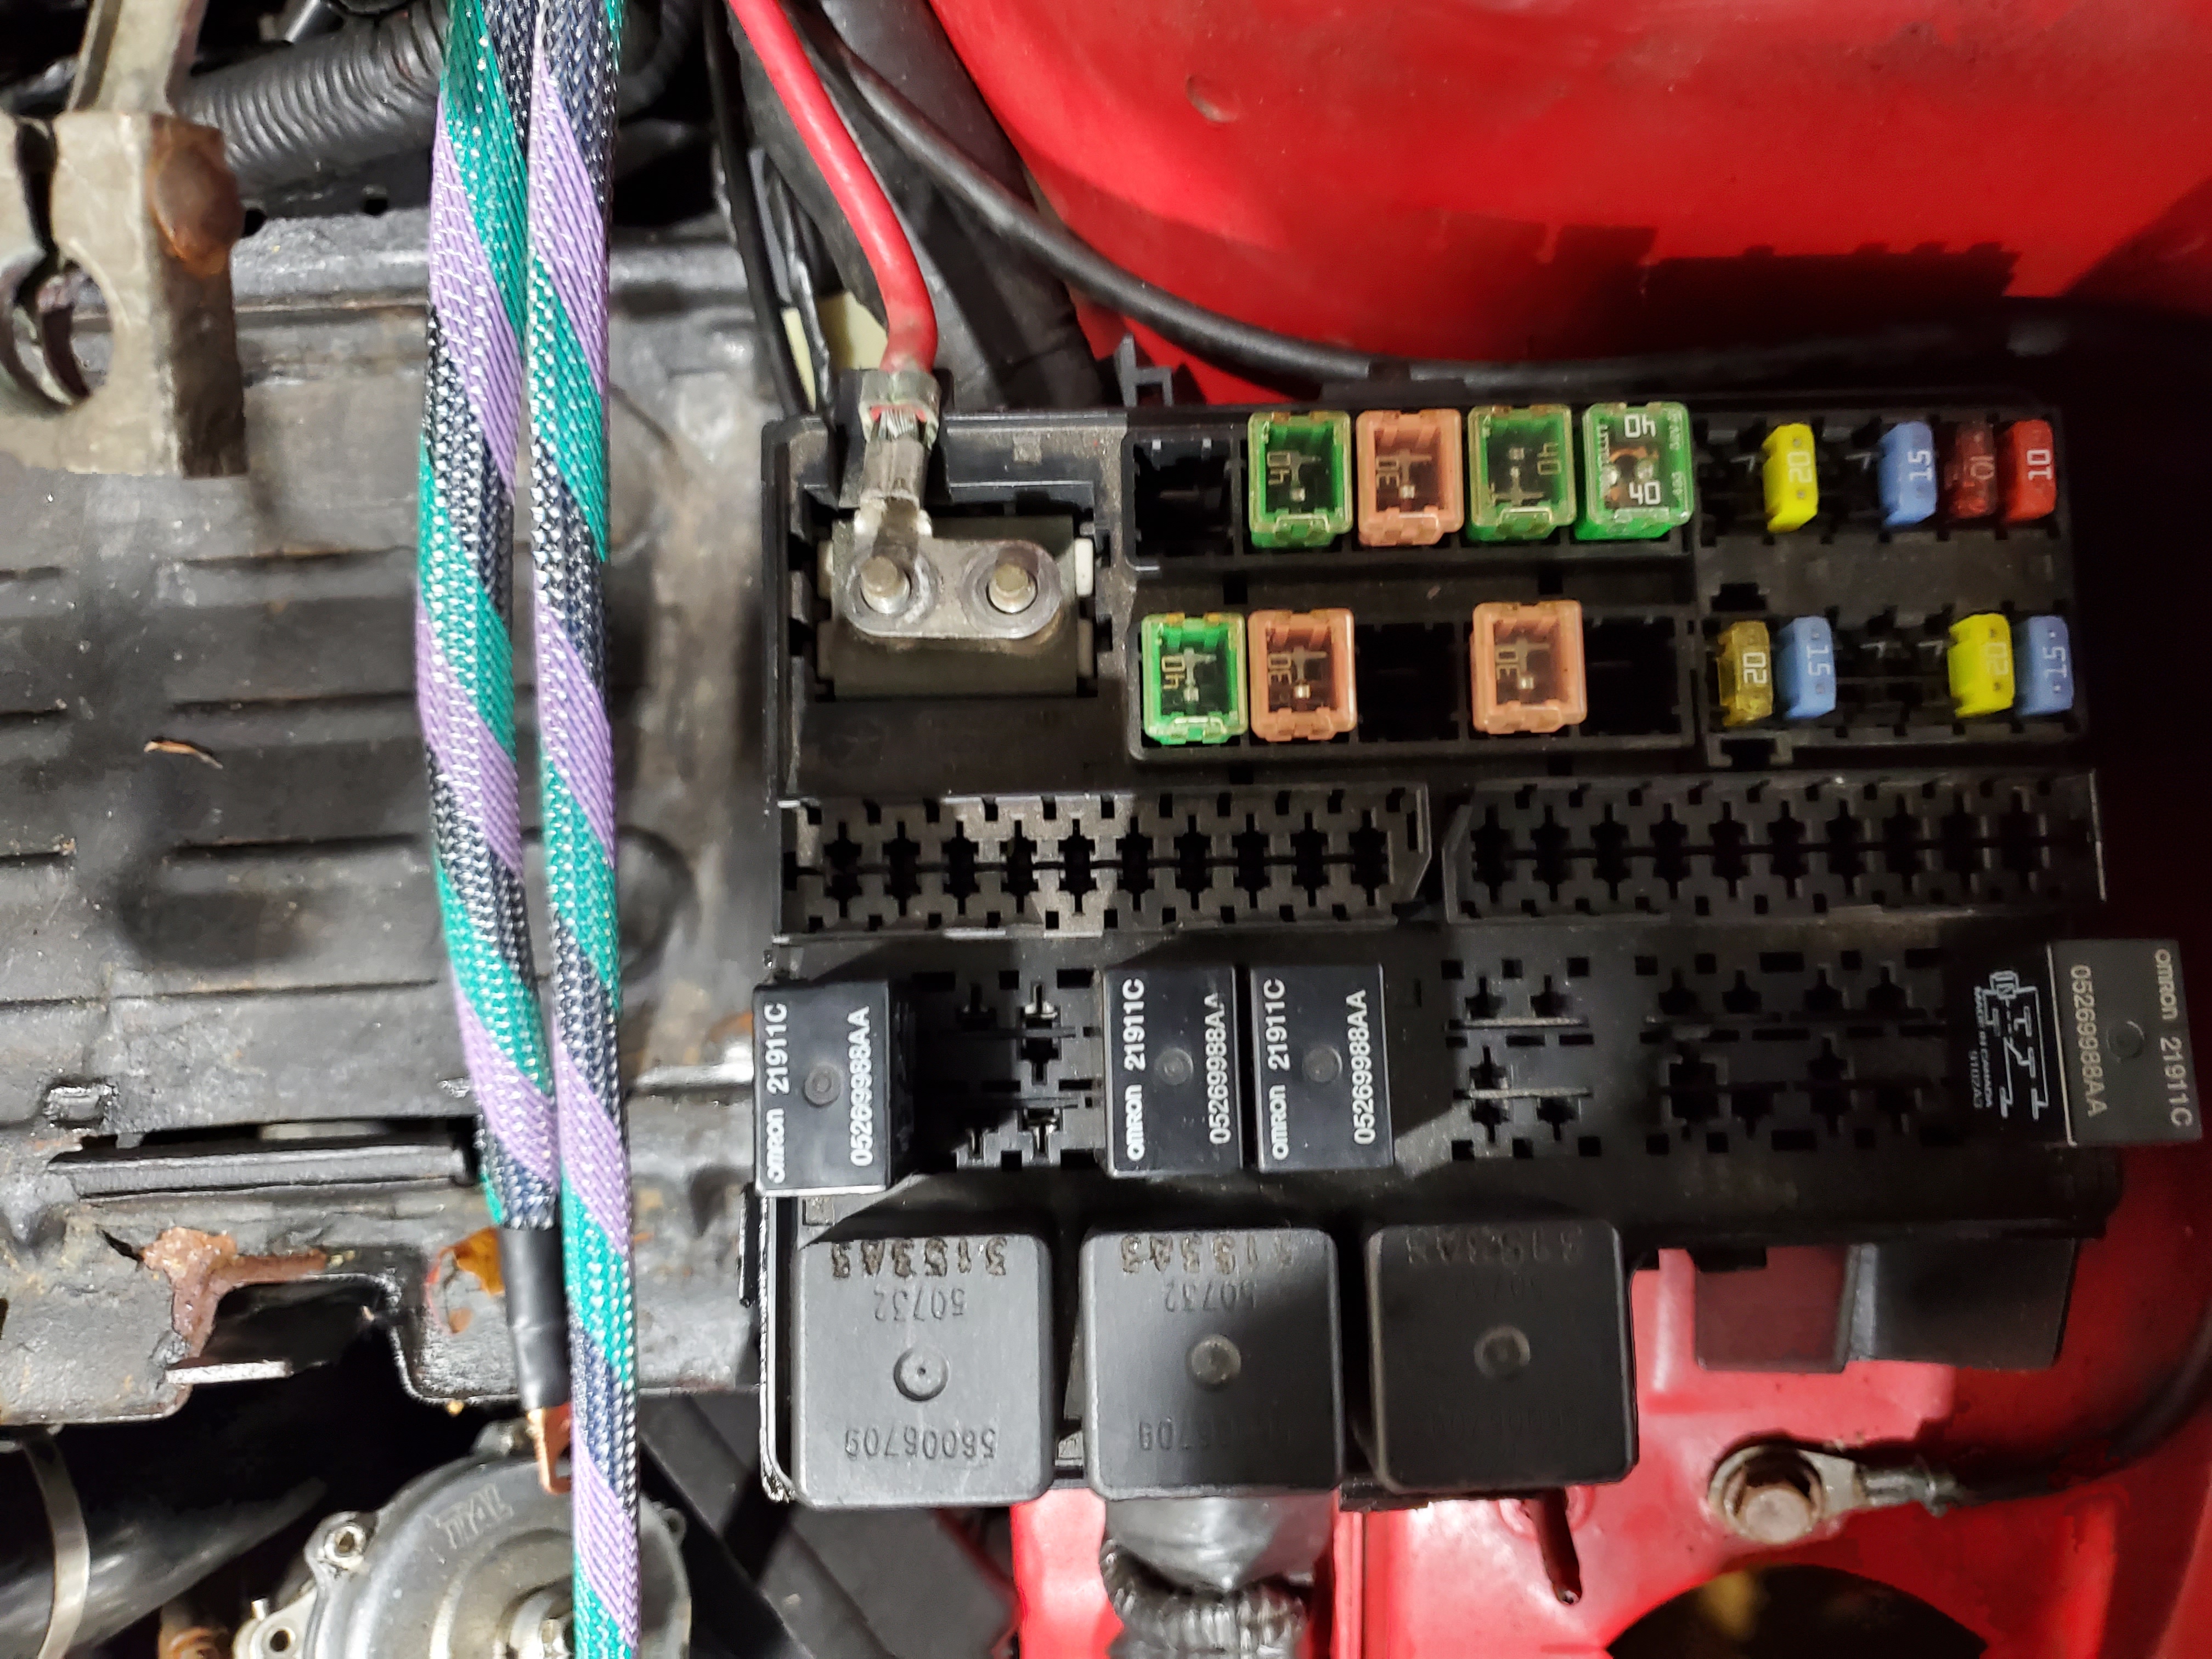
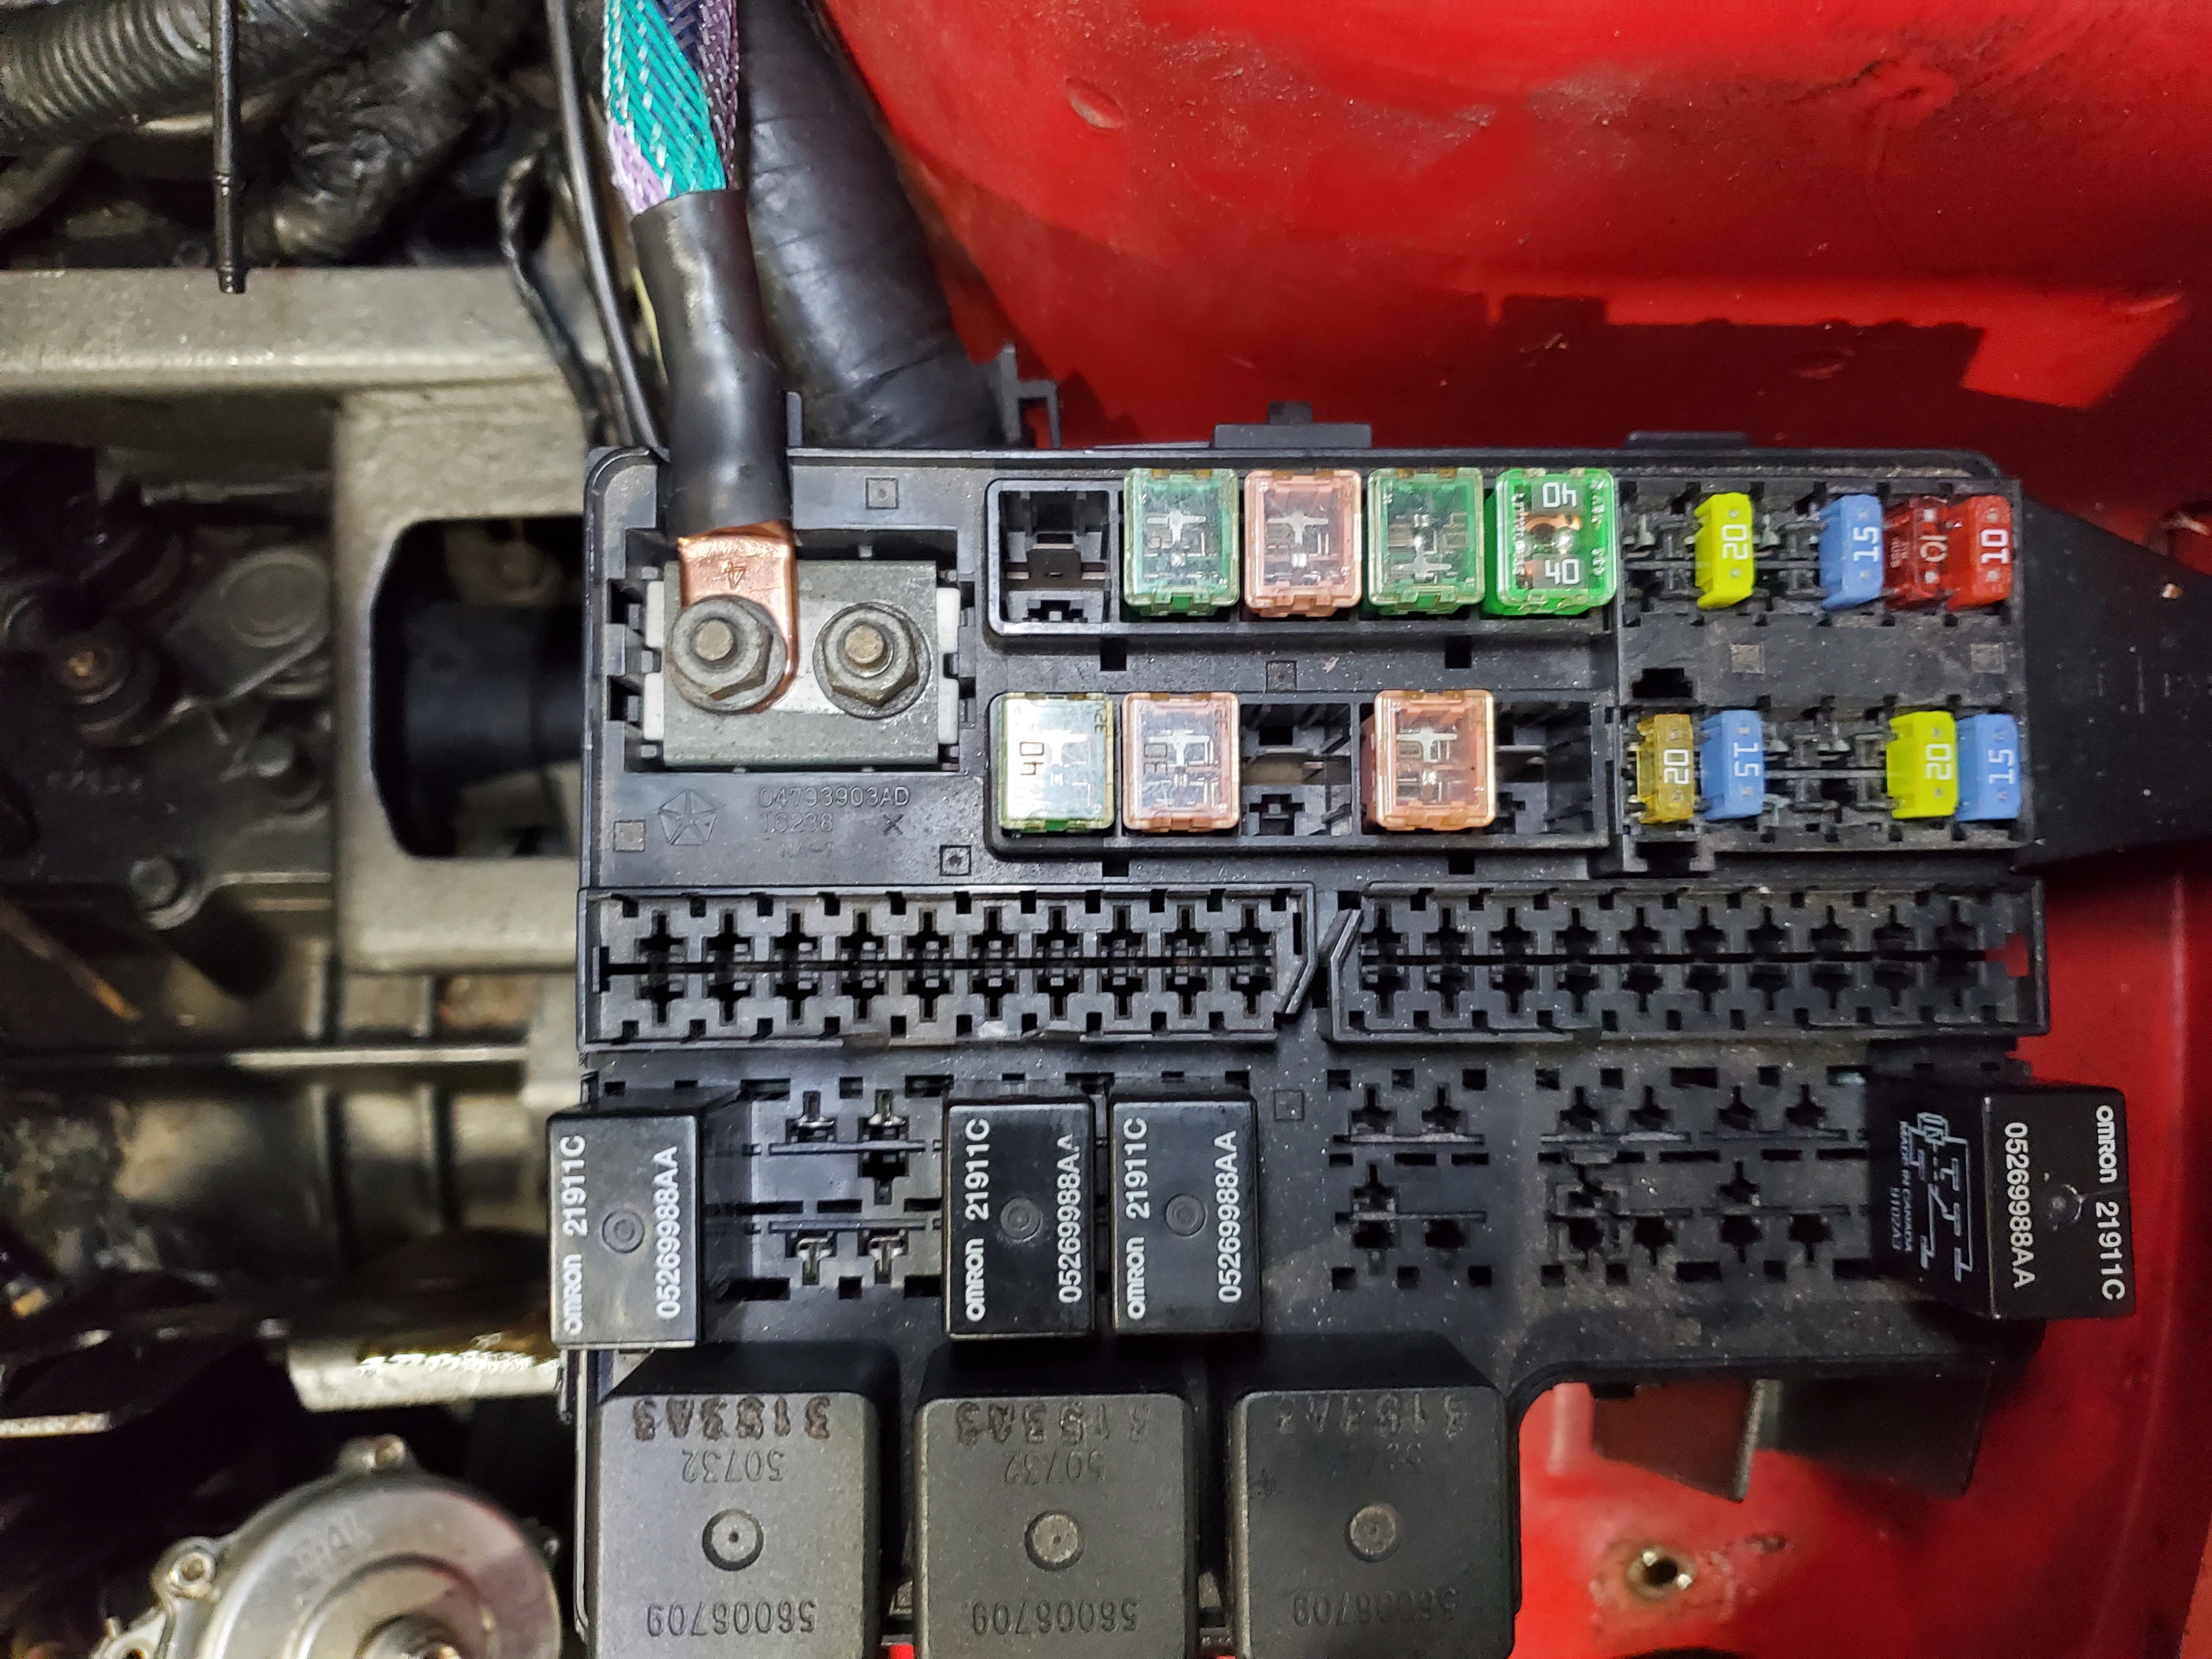
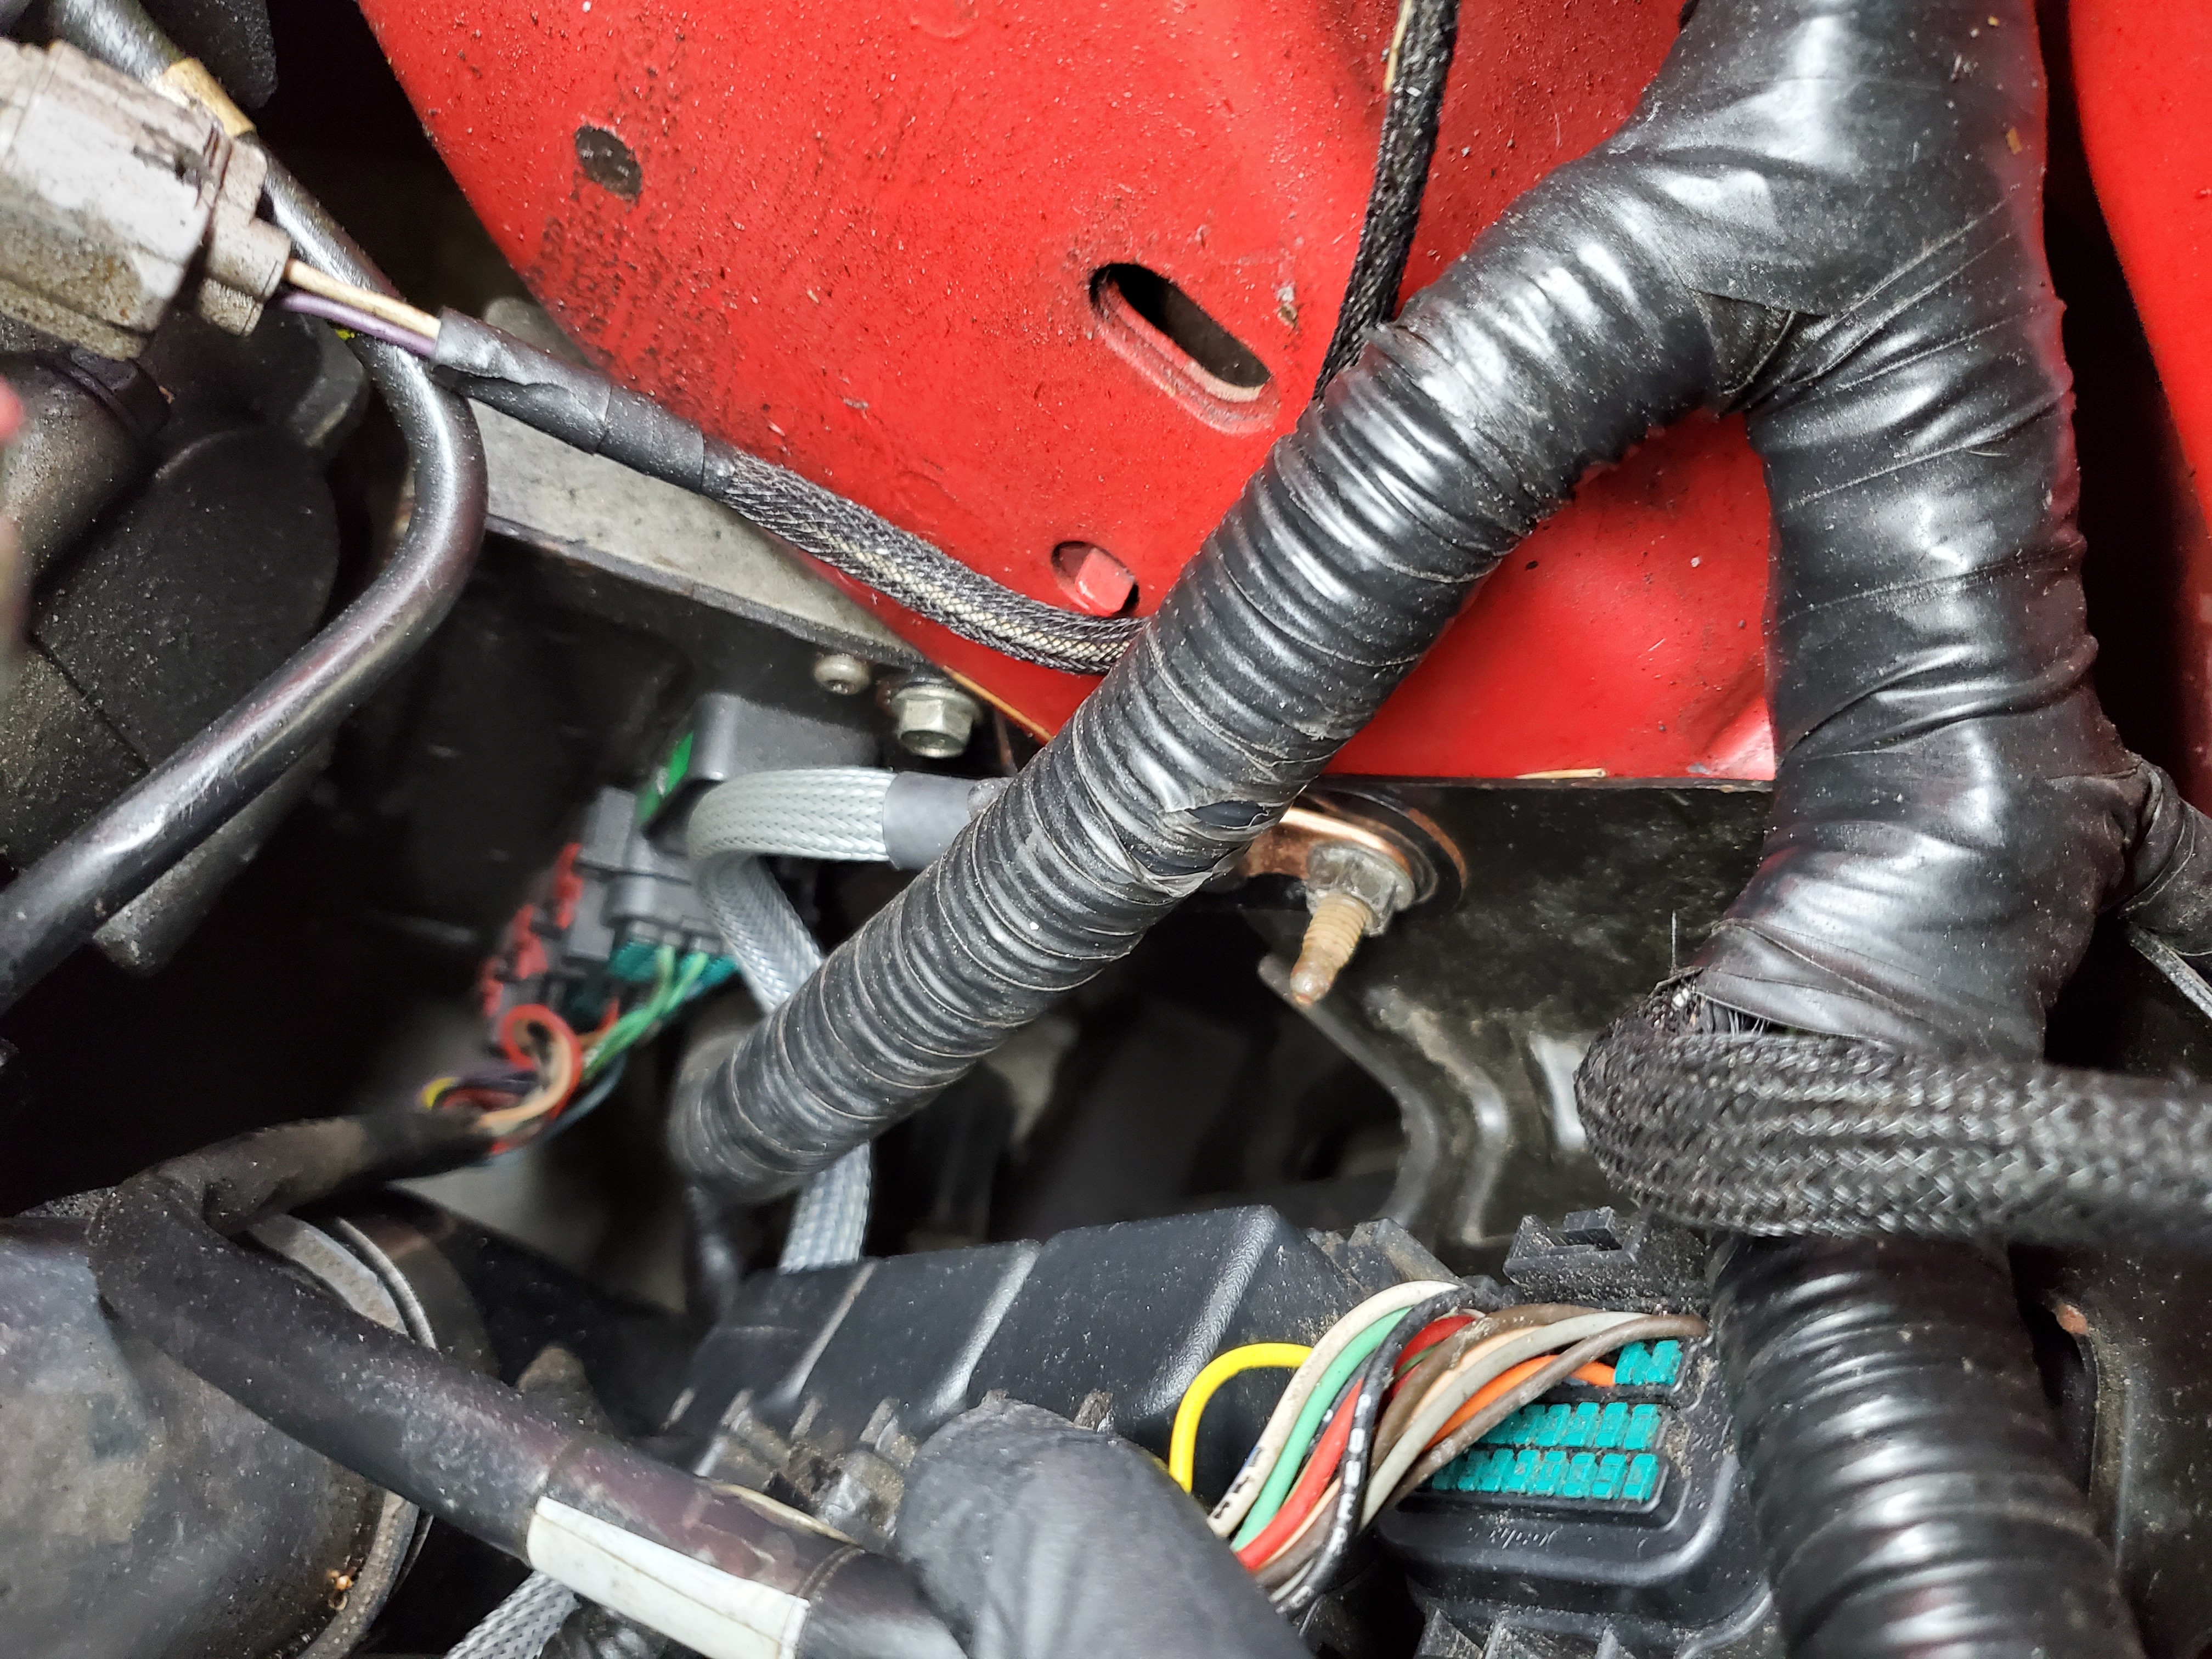
With the (2) main 4Gauge wires routed mostly out of the way the next steps to take are to remove the factory power and ground wires from the chassis, starter and fusebox. Start by lifting the engine bay fusebox cover and removing the (2) 10mm nuts securing the fusebox power wire:
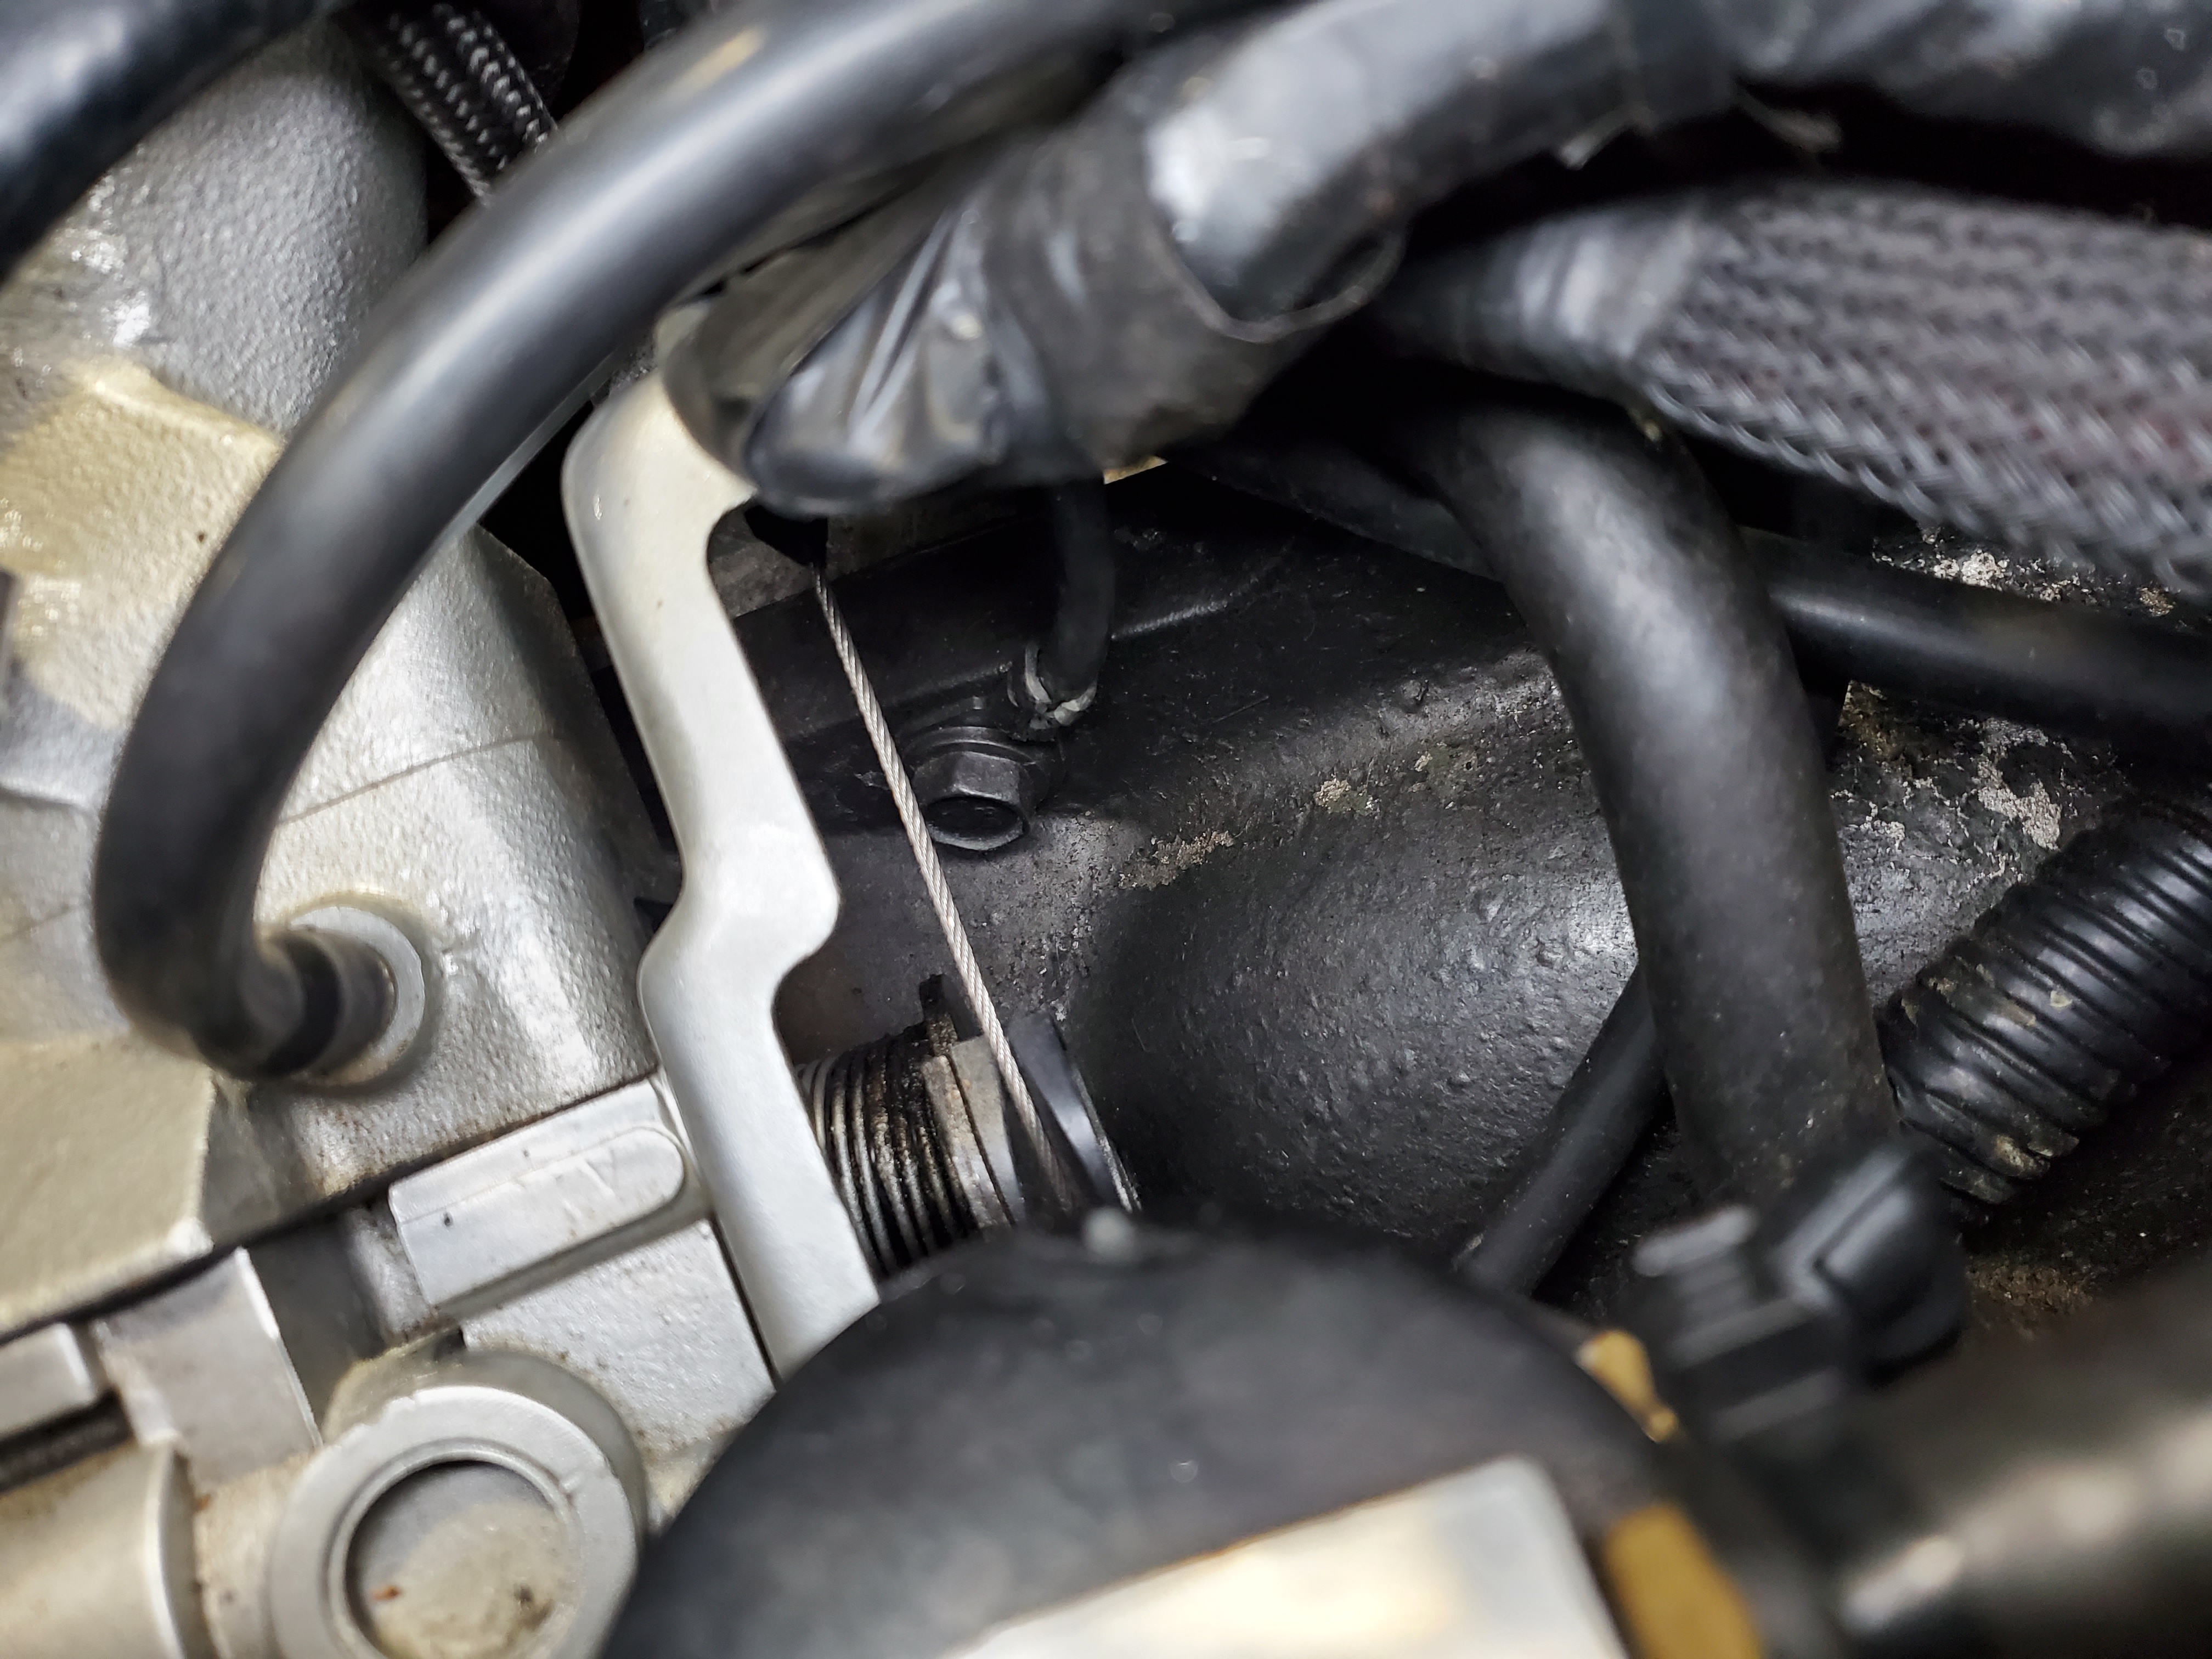
Next we will need to remove the factory battery ground that can also be seen from the above photo. The bolt pictured above is not the factory bolt, the factory bolt will be a 8mm with the option of using a phillips #2 screwdriver.
From here we move to the factory starter ground which is secured with a 15mm bolt. Some may find it easier to remove by taking out the cold-side intercooler pipe as well as the throttle body but it is more than likely that you can sneak it by.
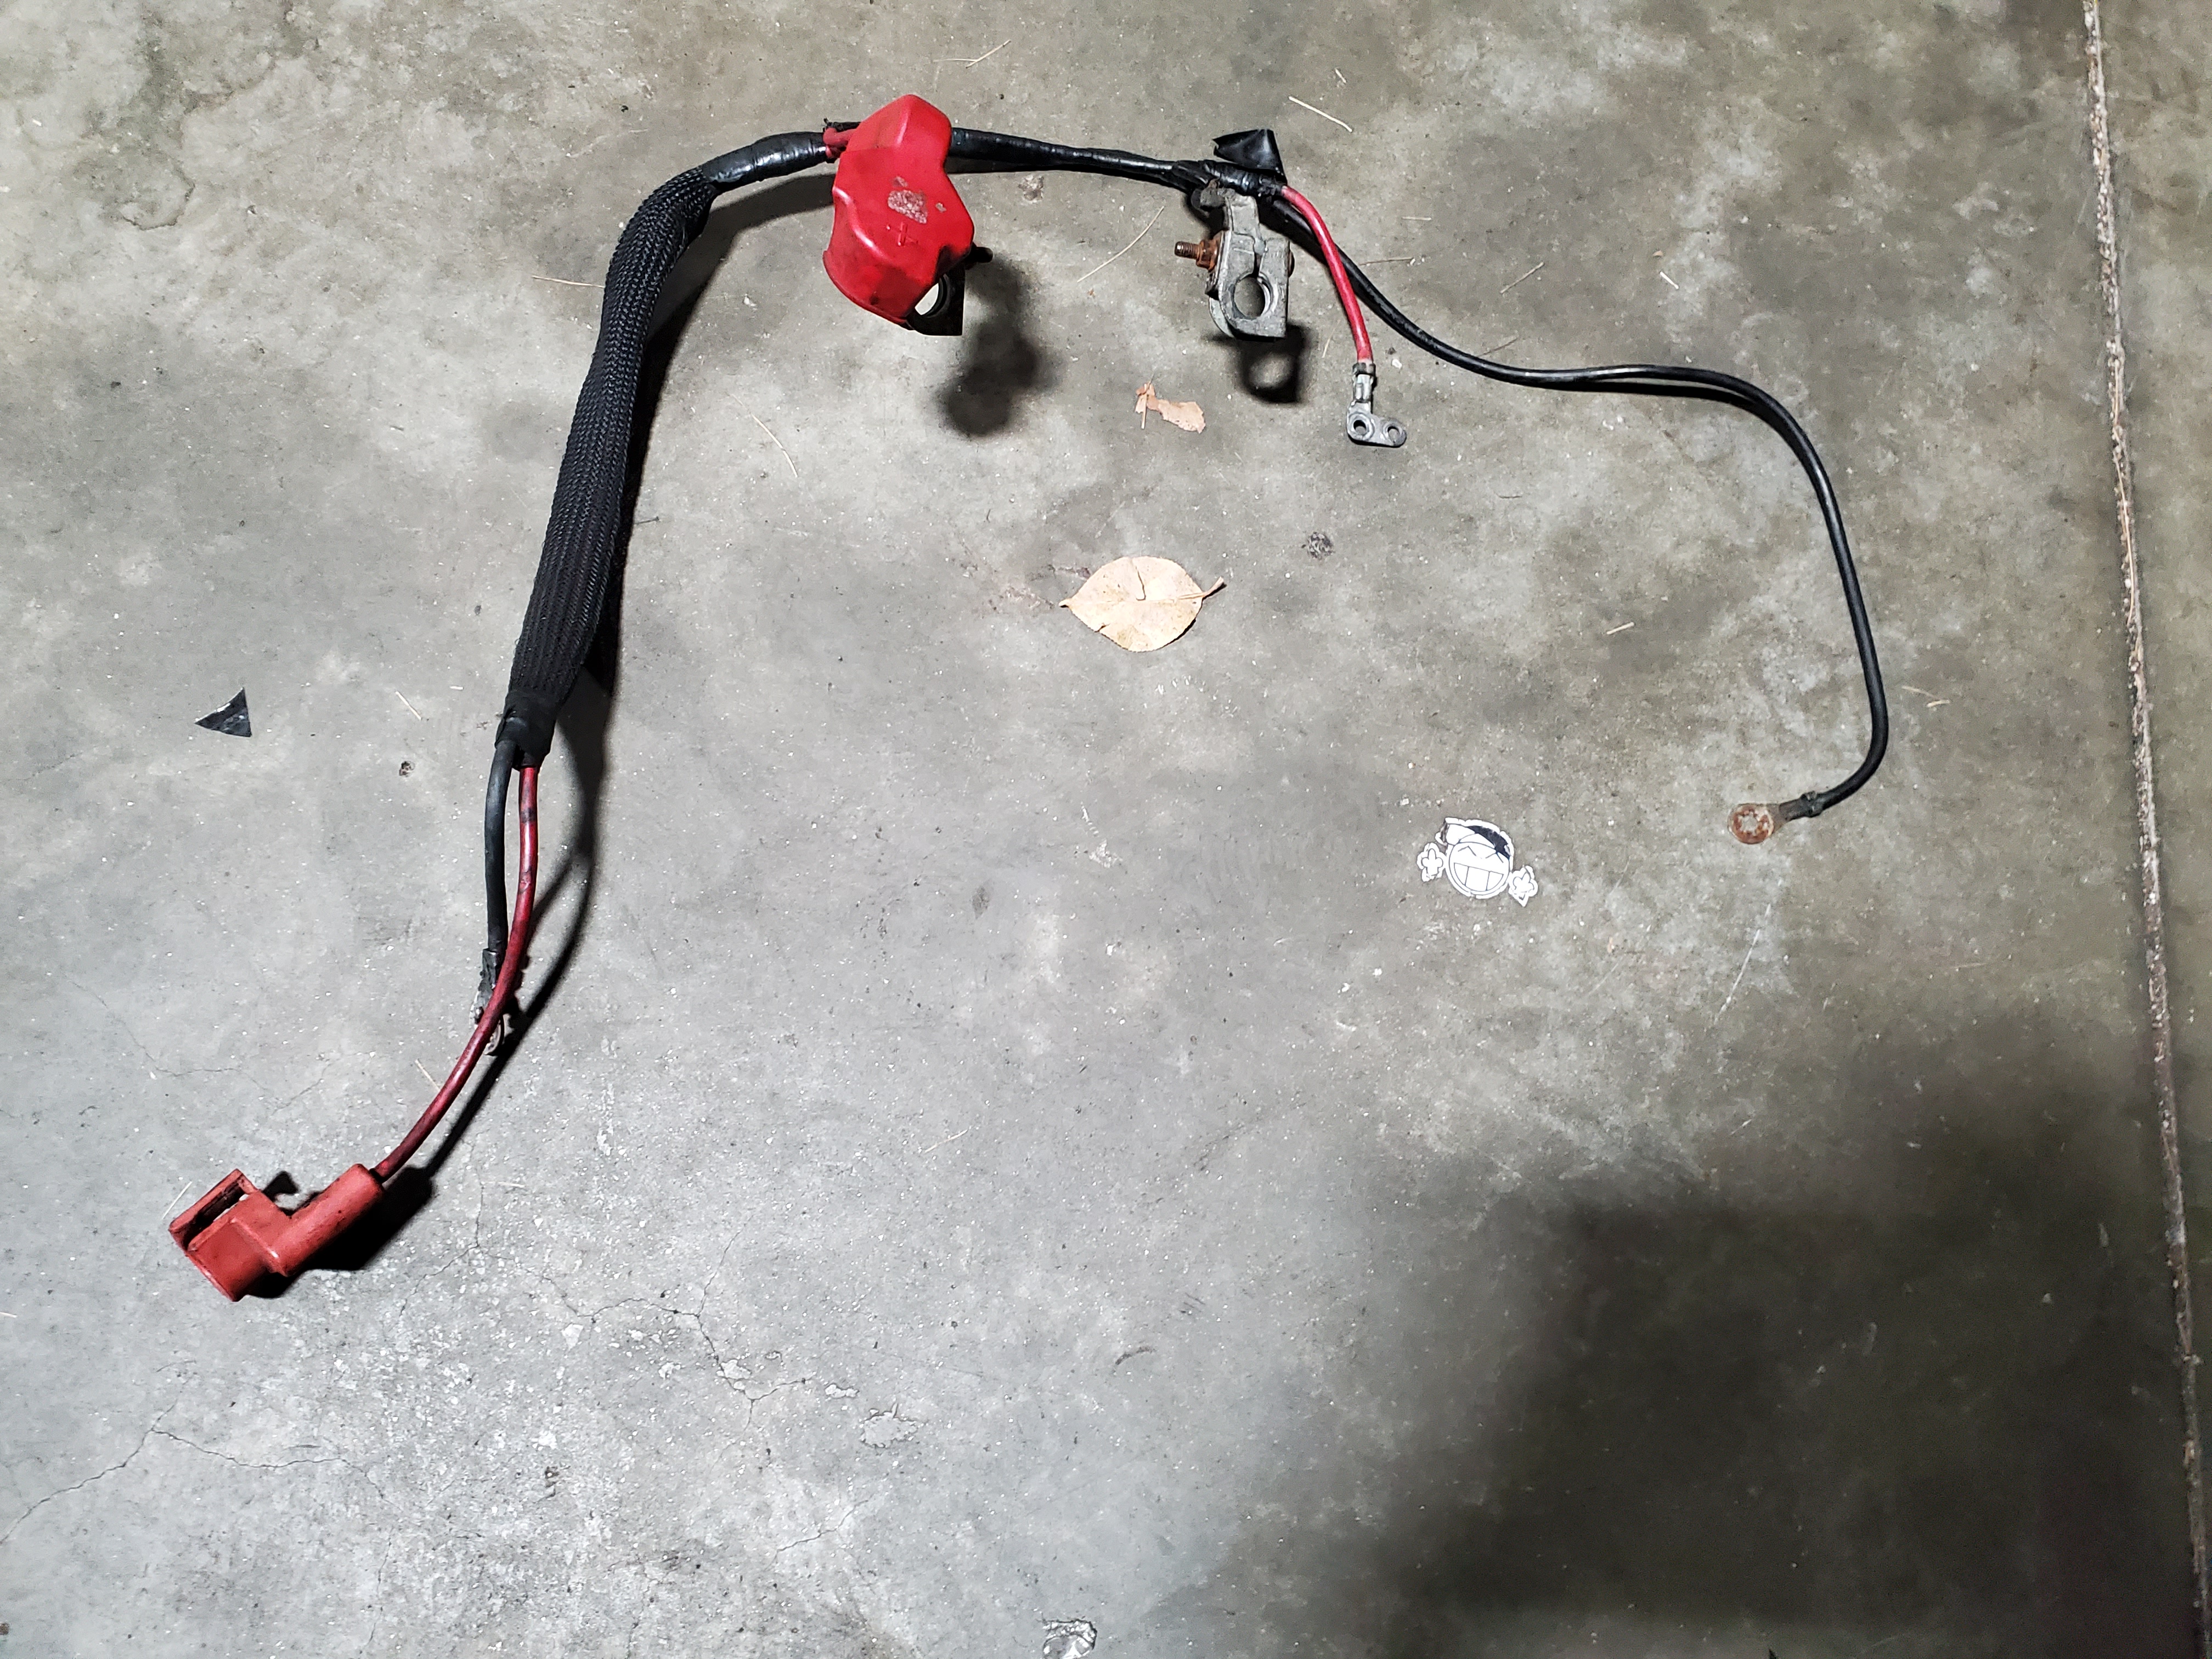
Last but not least in the removal of the factory wiring, the remaining wire lies on the starter. The easiest way to get to this from above is with a 13mm socket, a long extension and a ratchet. When the 13mm bolt is removed you will see (2) power wires on the starter. One has a plastic red cap on it and the other is a green wire with a standard eyelet. Separate those two wires from each other and you can now remove the factory power/ground wiring completely. It should look like the following when removed:
Next, remove your center console which is secured by (6) phillips head interior trim screws. You will also want to remove the drivers lower dash cover which is secured by (2) phillips head interior trim screws.
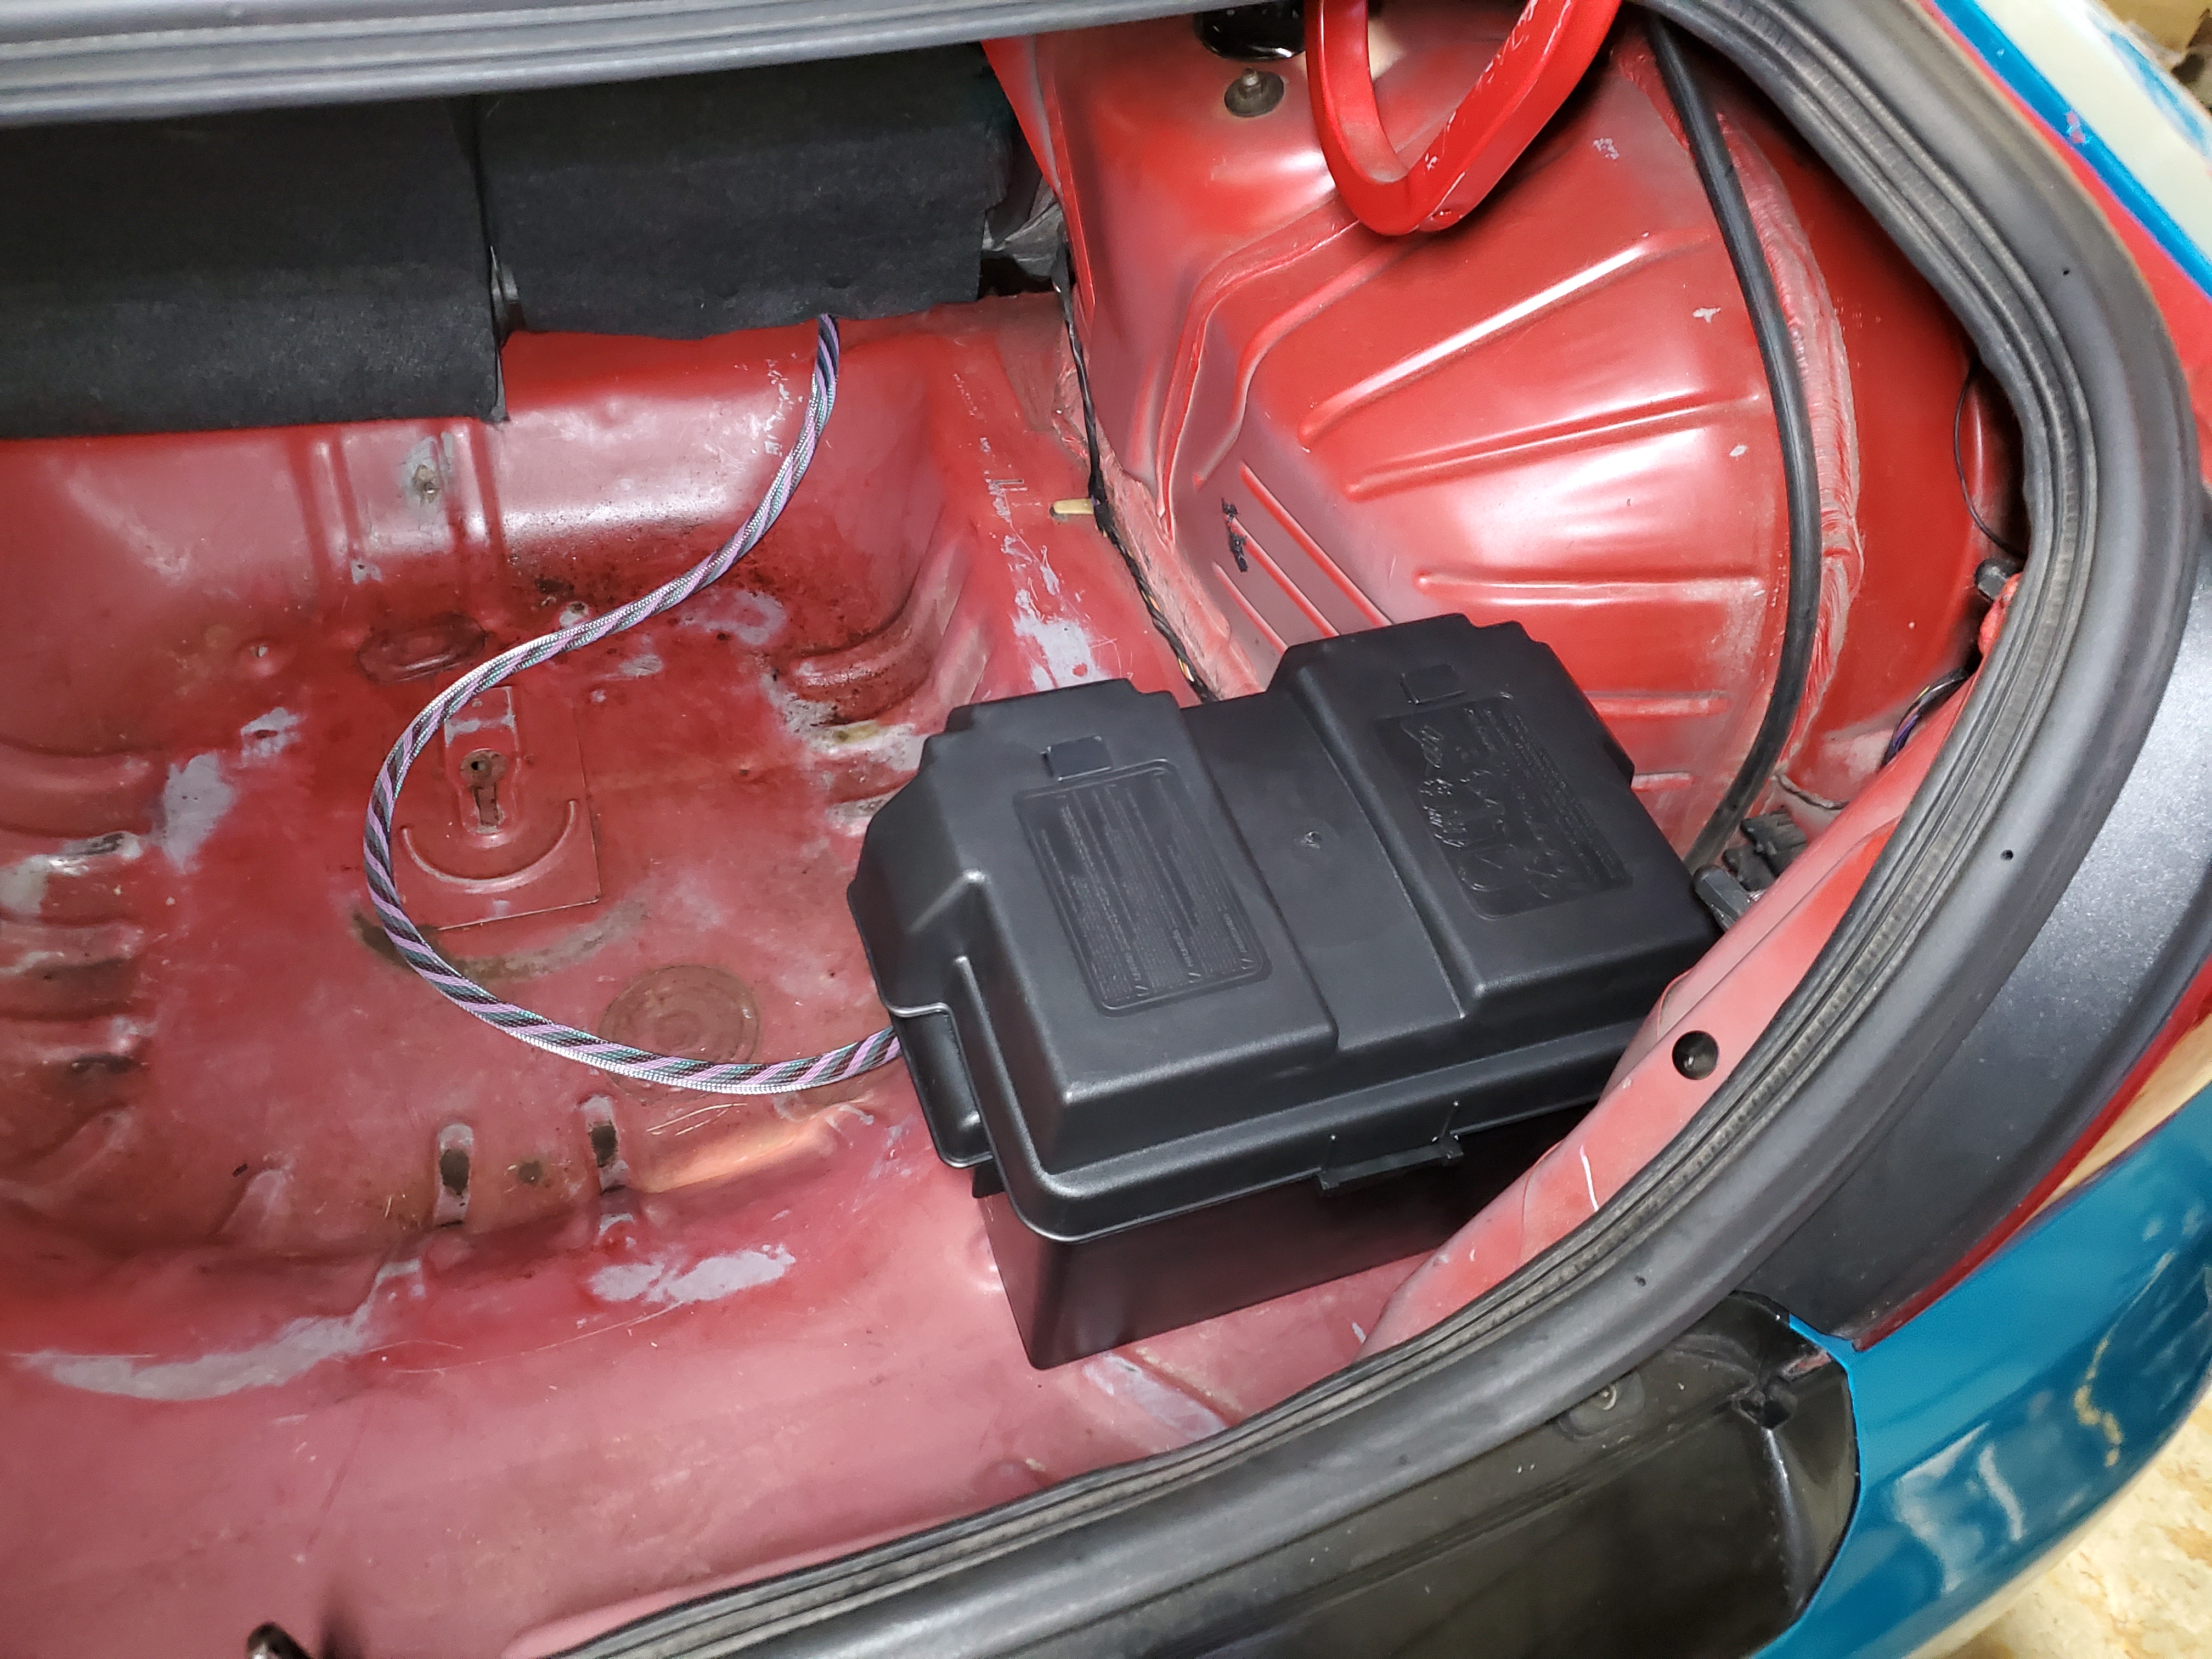
You will now take your 0Gauge power wire and route it from the trunk into the cabin. The easiest way to do so is to fold down the top half of the back seats and removing the lower half of the back seats. The 0Gauge wire will then route under the rear seat location and through the carpet along where the center console sits. You will then take the power stud we have provided you and remove the upper right 10mm nut from the shifter linkage. Place the (20 supplied M6 washers down on the bare stud and then place the power stud on top of them. Tighten down with the supplied M6 nut in your kit. The washers are used below the power stud to prevent any possibility of a power wire coming in contact with bare metal.
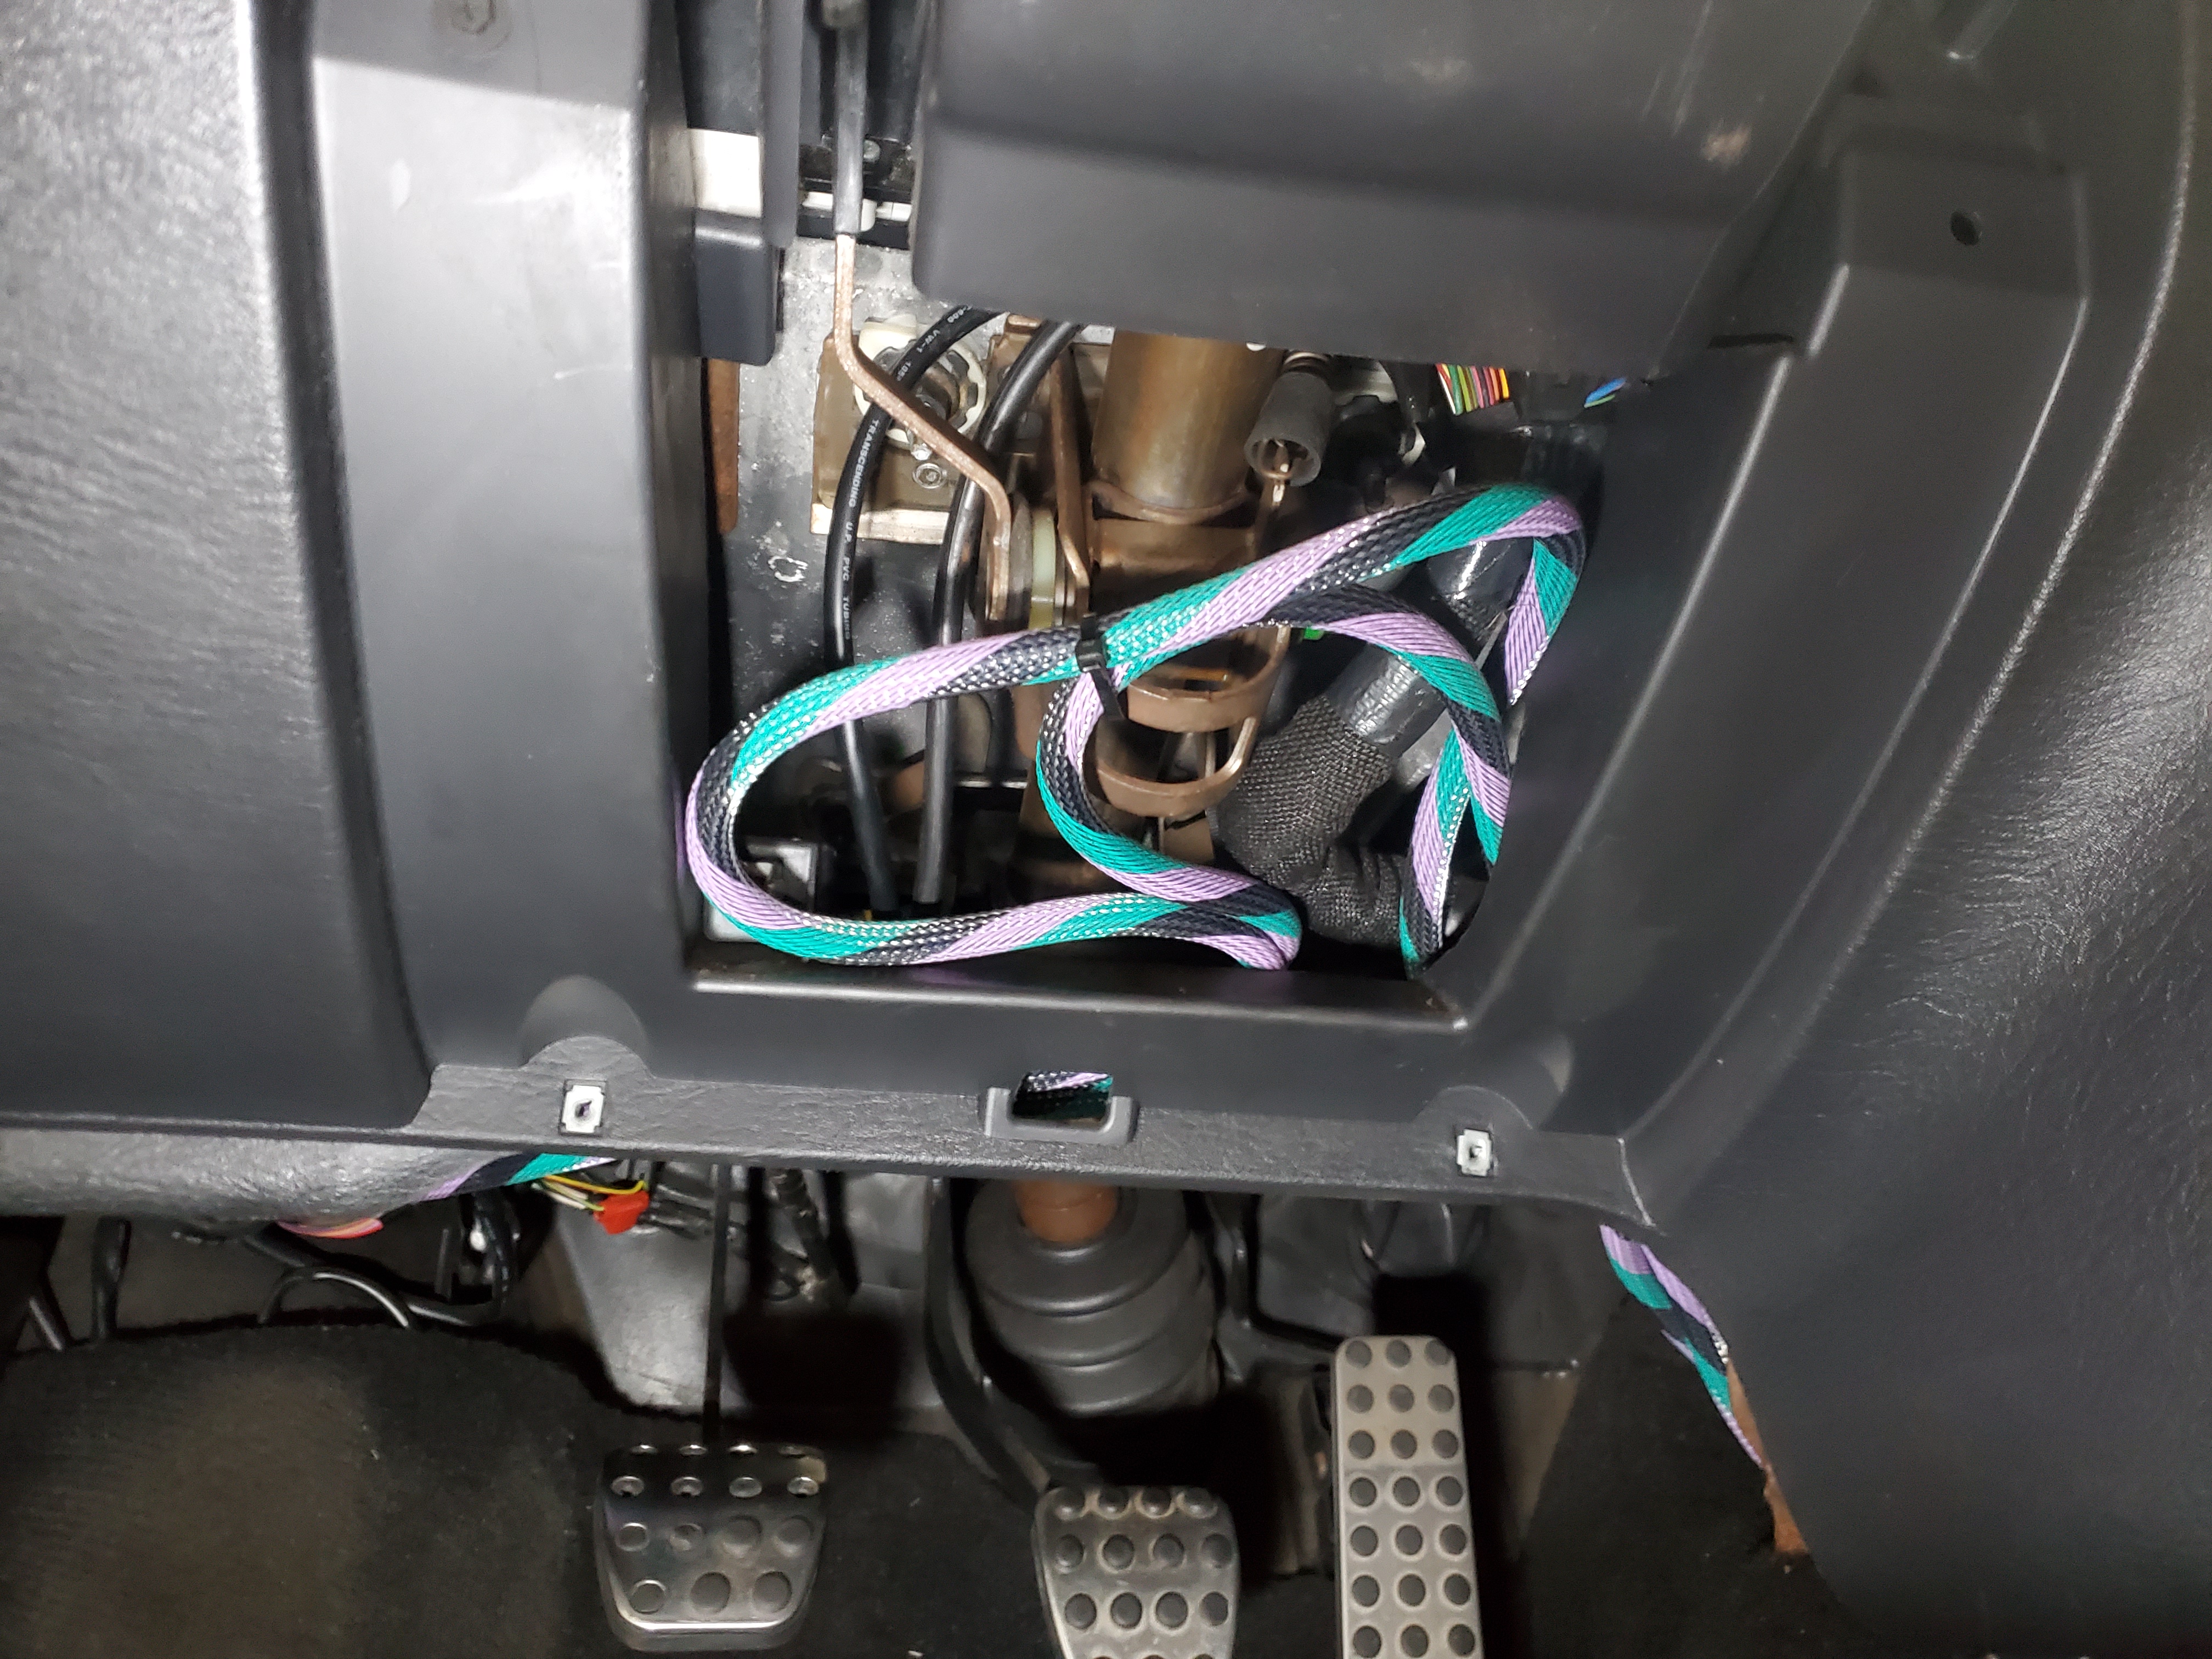
Next you will take the (2) 4Gauge wires routed into the cabin earlier and pass them through the opening in the lower dash cover and secure with zip ties as seen below.
*Wiring will not be as coiled as seen in the picture below, all proper measurements have been taken to ensure a good fit*
Next you will secure the degreed terminal to the starter along with the Green power wire that was removed when taking out the factory power/ground wires. Also, you will now want to secure the fusebox power wire with oone of the factory 10mm nuts we moved previously. It looks like that wire was meant to go there.
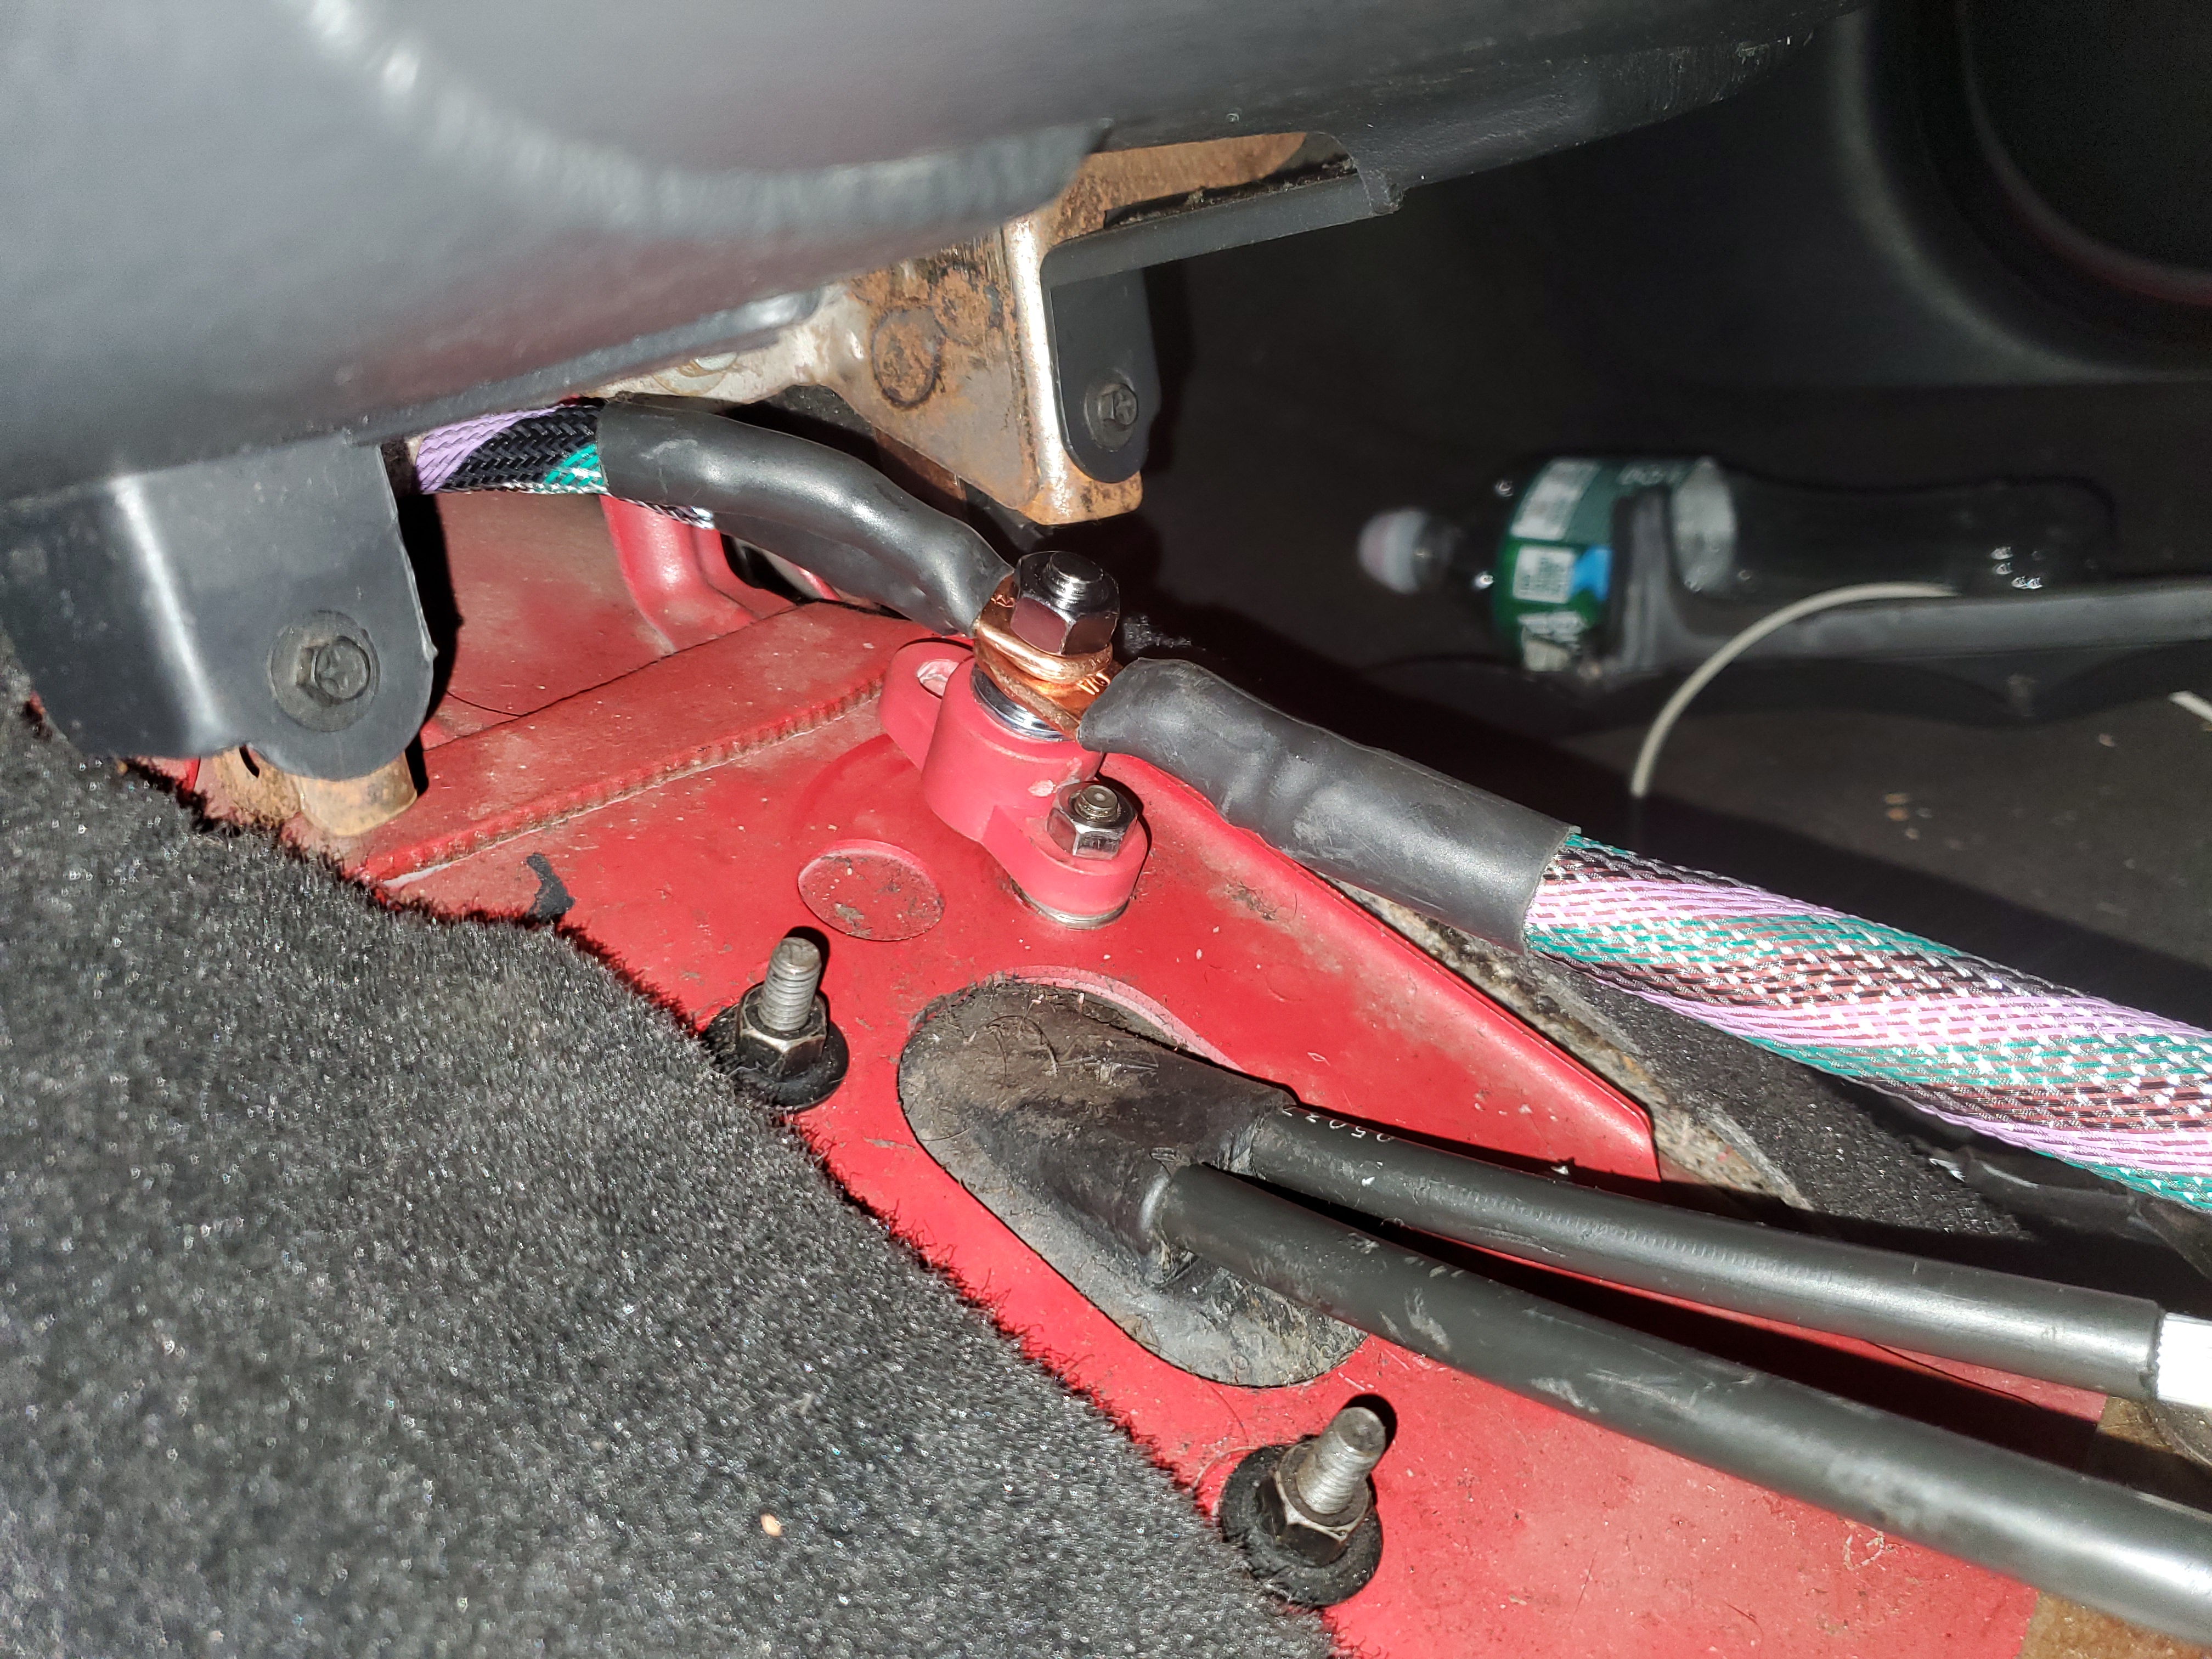
Now that all the power wires are taken care of and secured, its time for the grounds. For the starter ground you will remove the lower 15mm bolt and pass it through the larger eyelet of your starter ground wire. The smaller eyelet of the starter ground will then be bolted to your PCM bracket with an already existing 10mm nut found here:
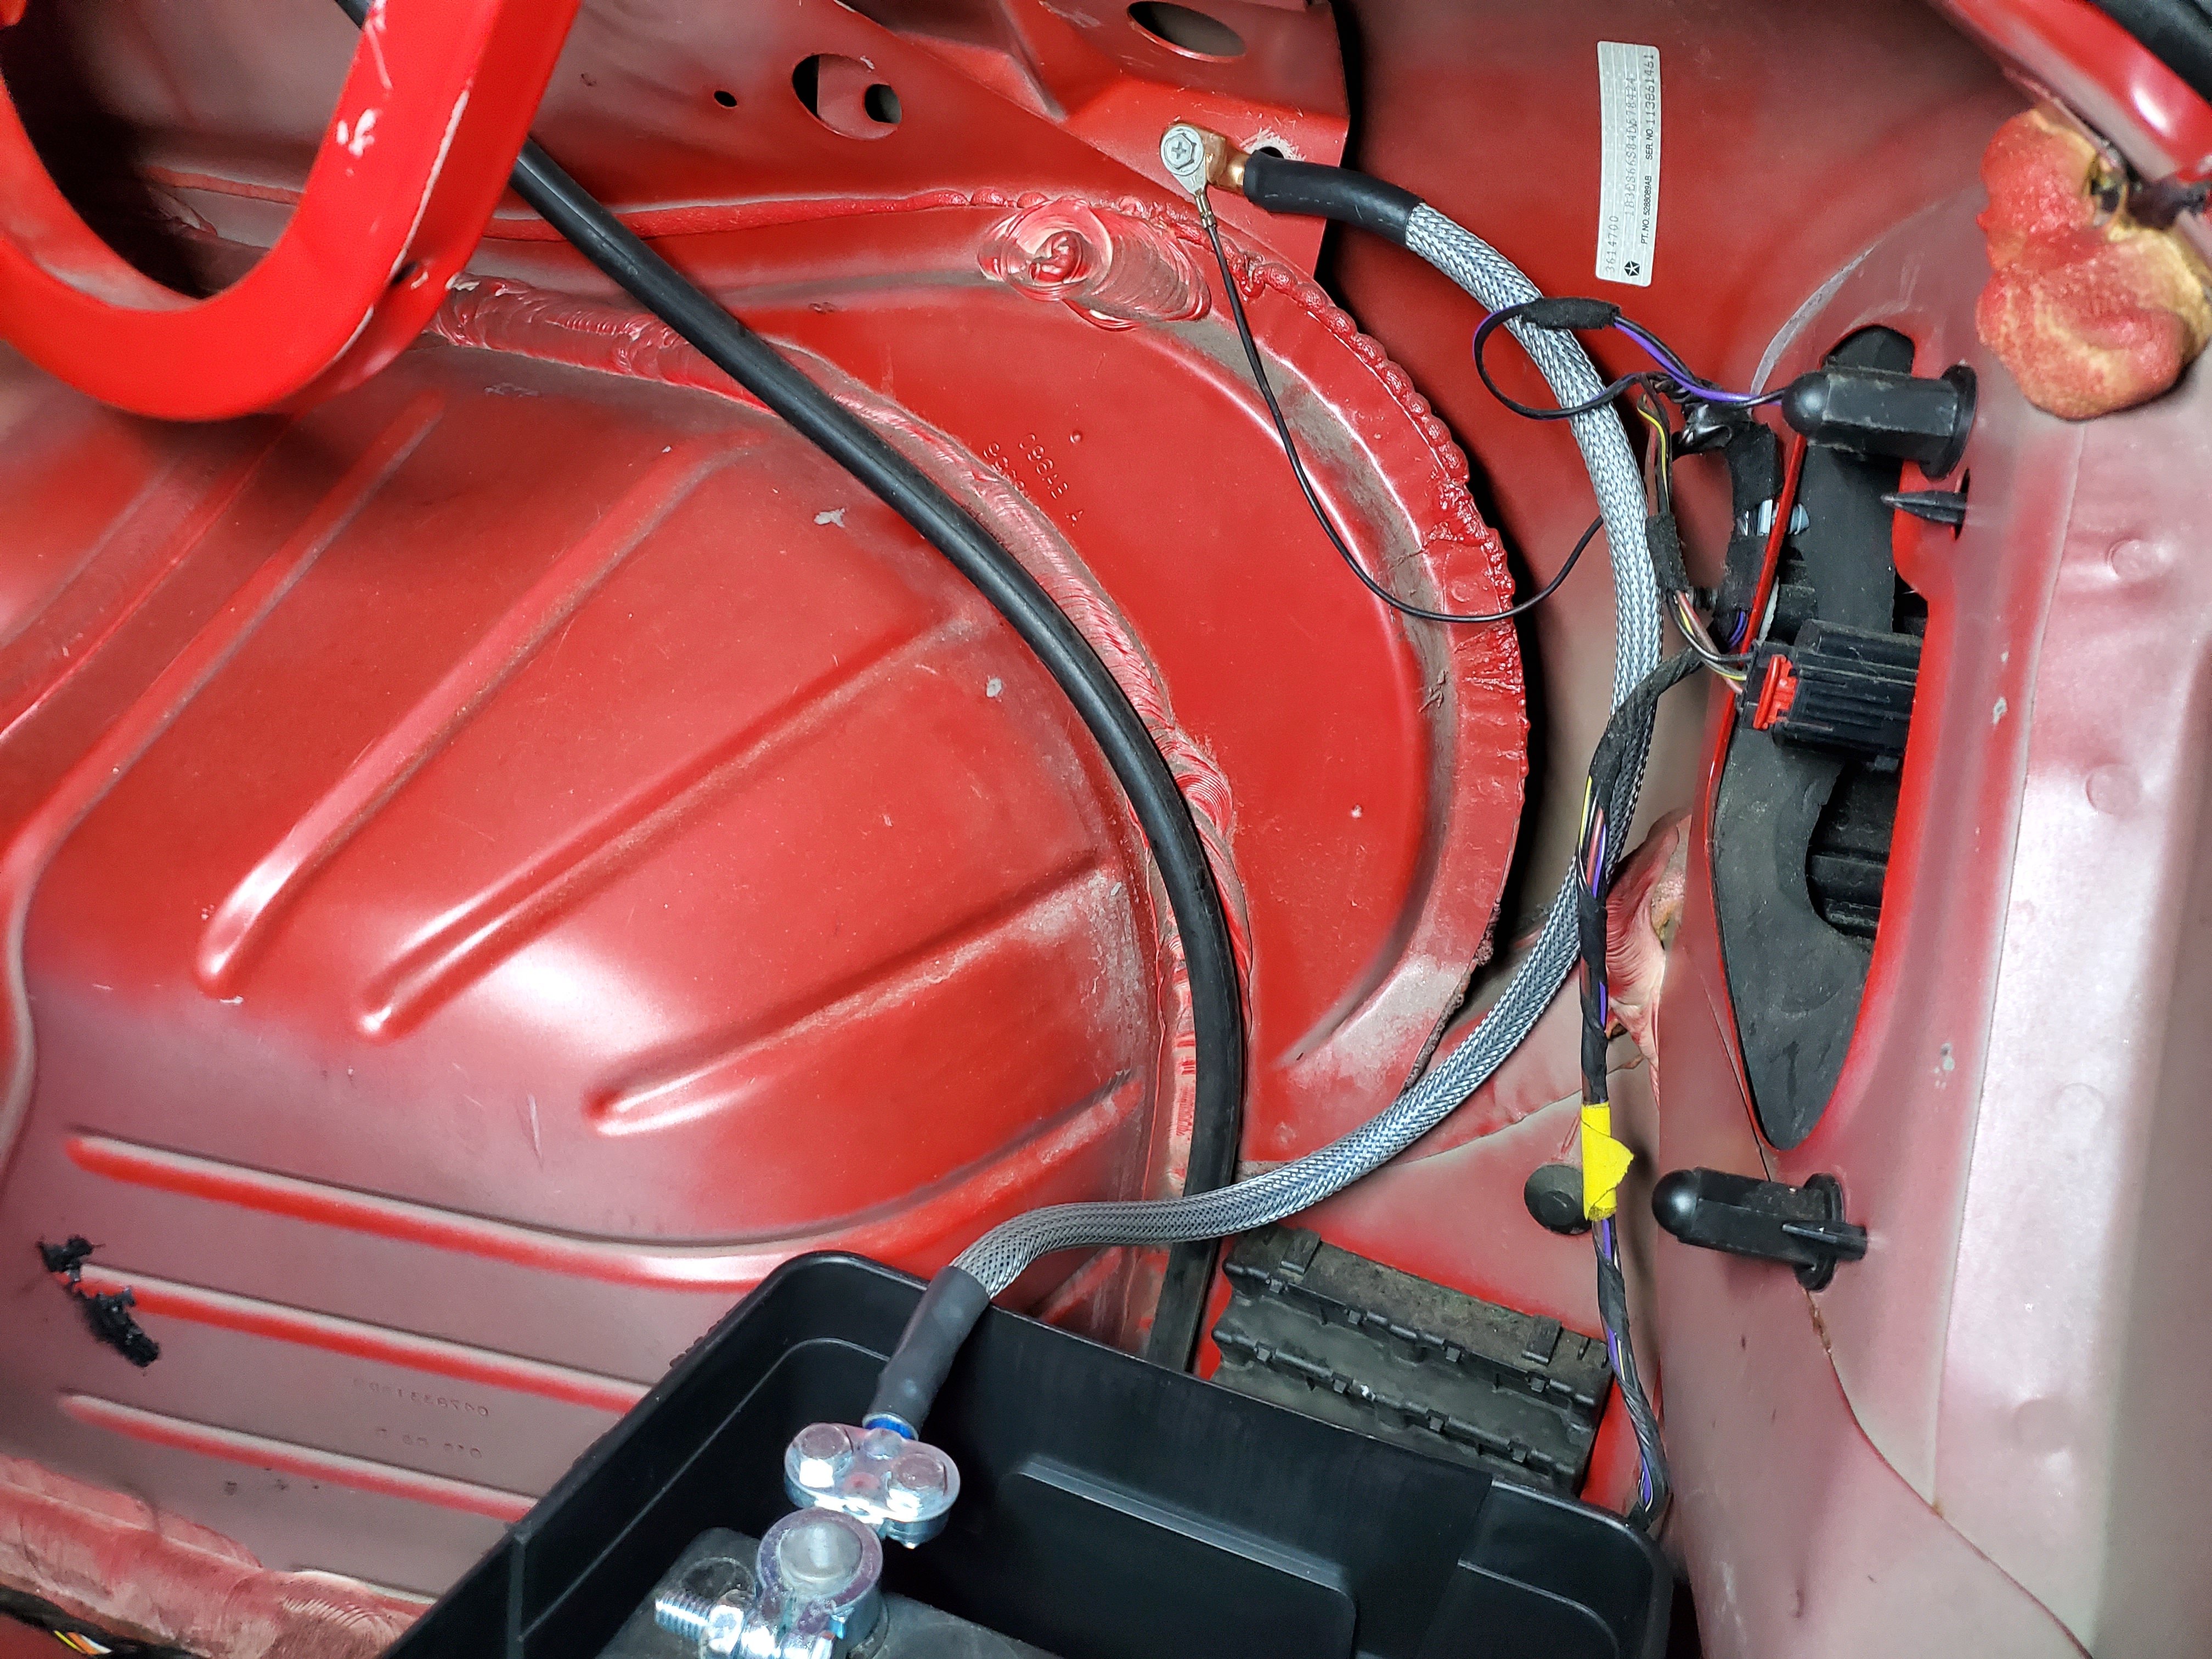
The last wire to take care of now is the battery ground wire. Make a small incision in your factory trunk liner (if still equipped) and pass through your new ground wire. The new battery ground will be attached to an already existing chassis ground. This ground will be an 8mm screw with the option of using a phillips head screwdriver. It is found here:
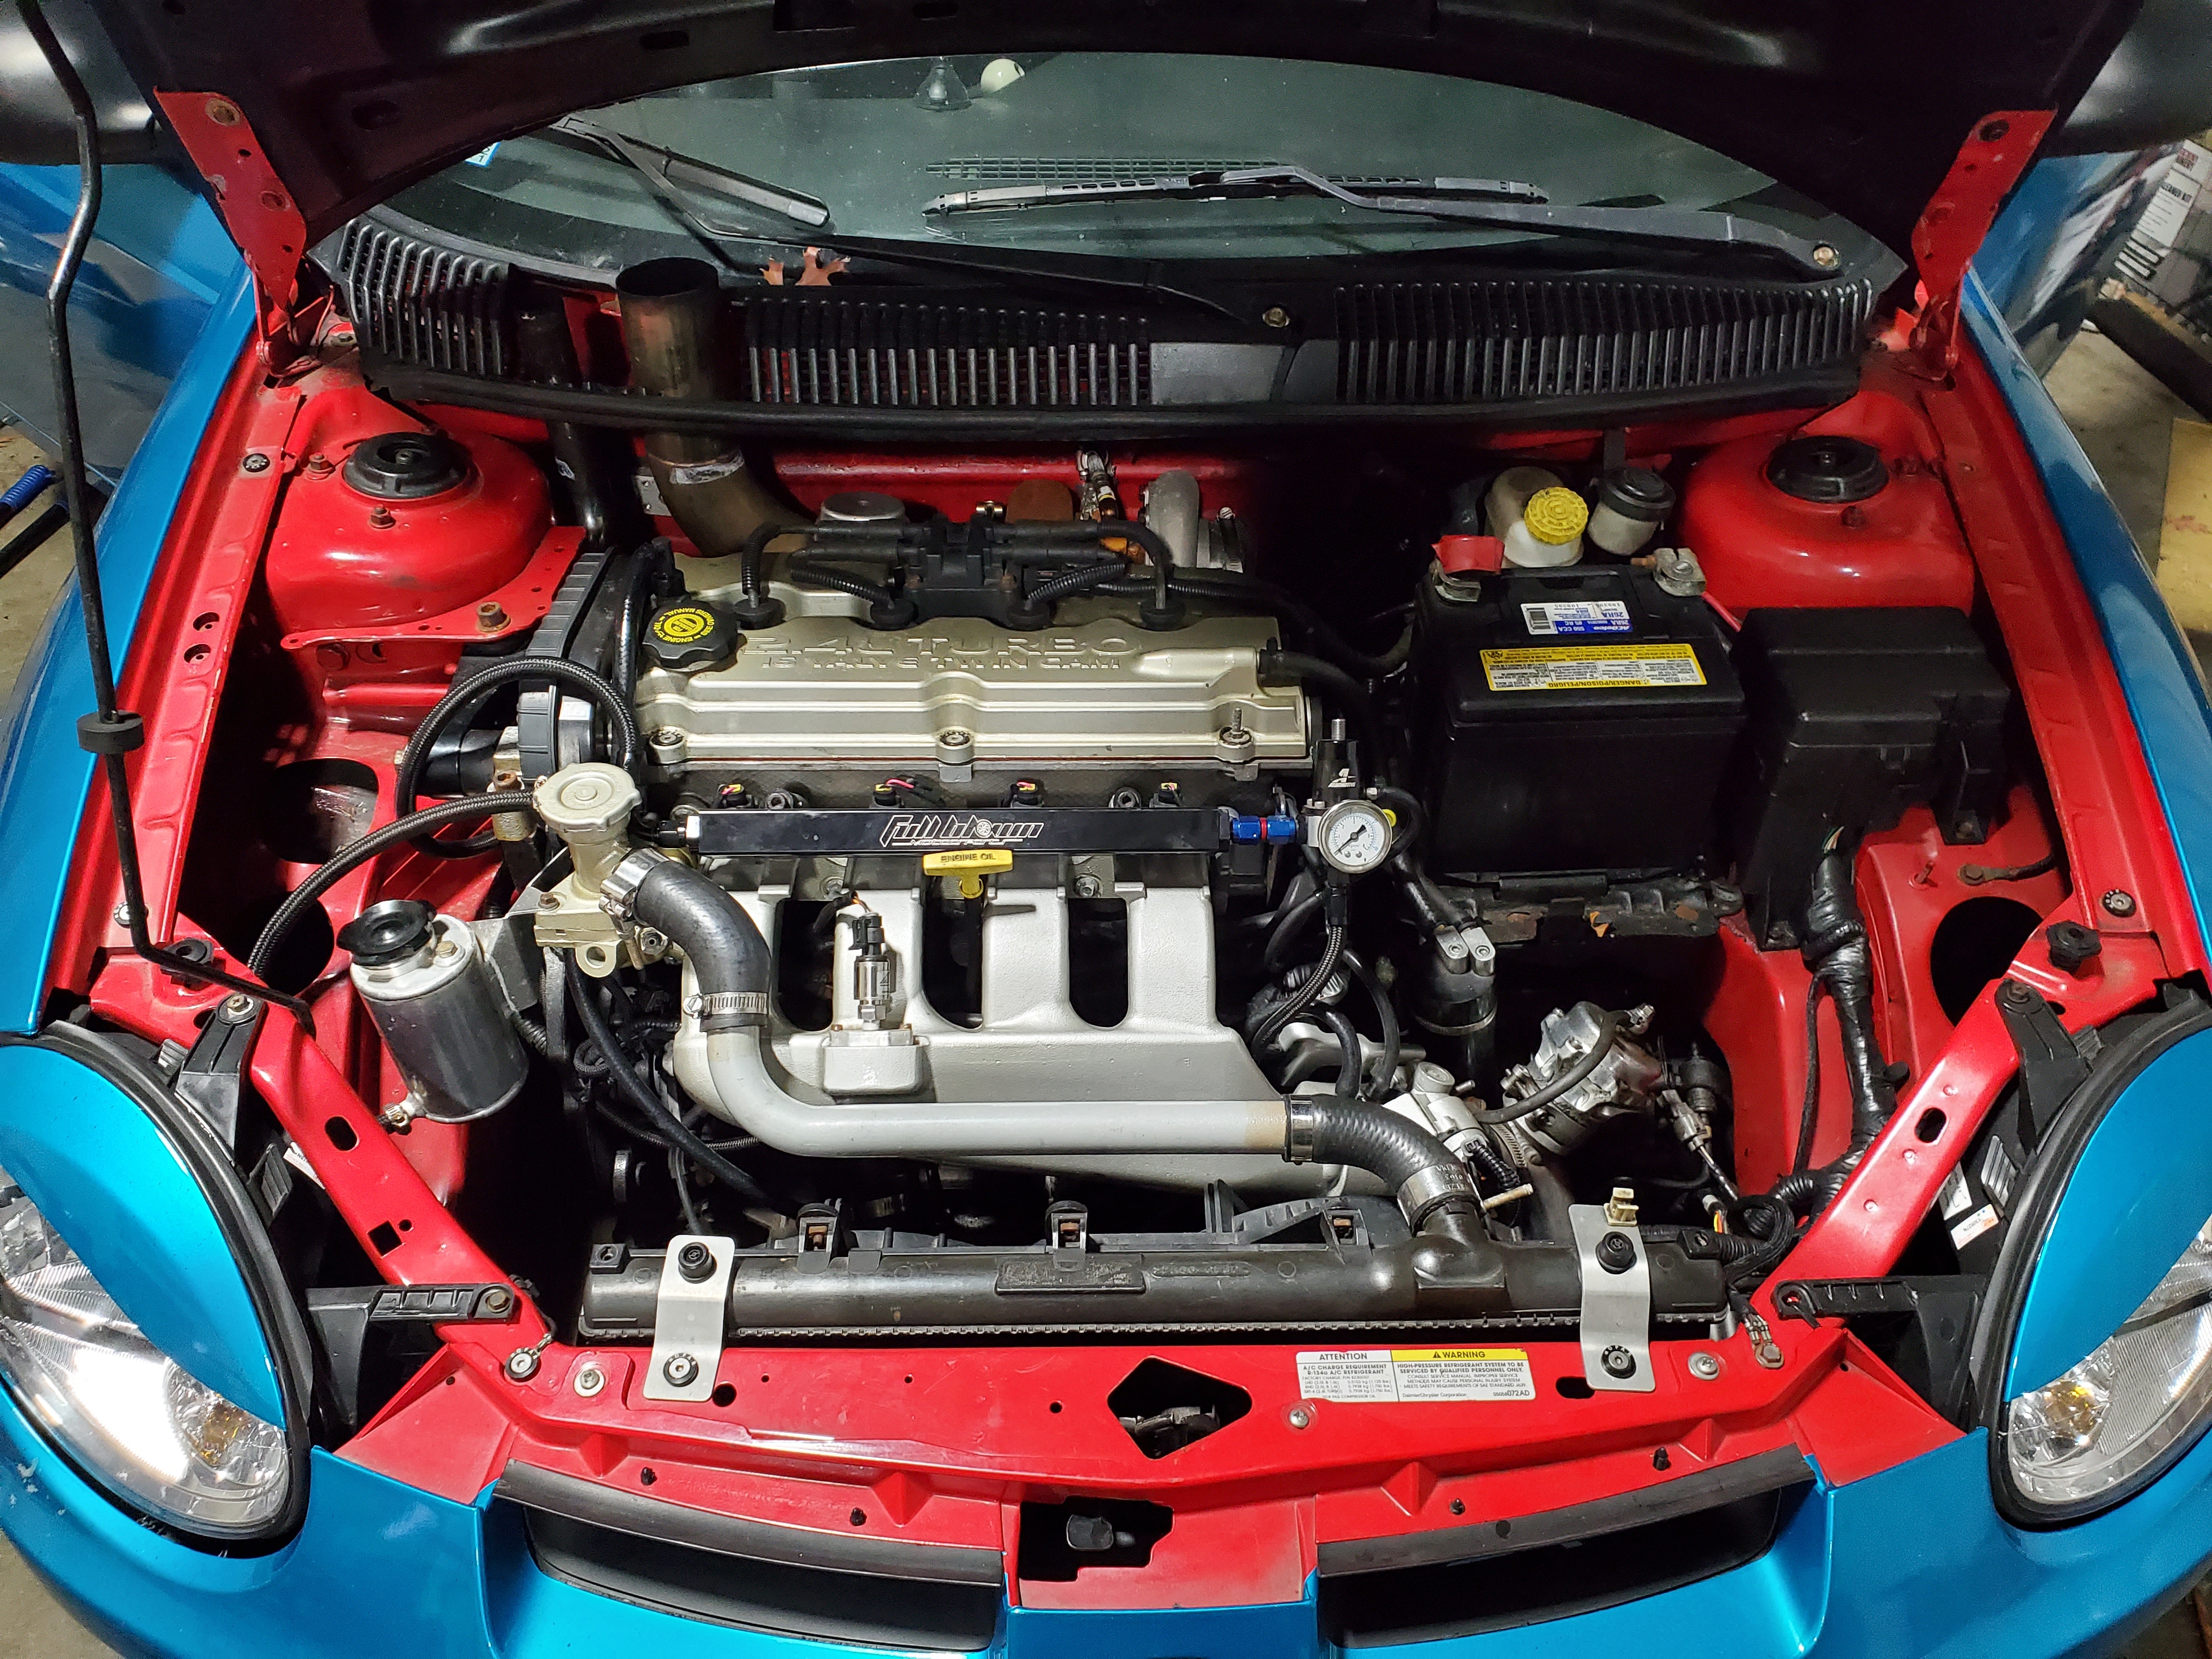
Double check all of your connections and reinstall all removed interior parts (trim, seats, console, etc.) Enjoy your cleaner and less crowded engine bay!